Deploy!
A Hands-On Guide to the How and Why of Deploying Websites Using a Variety of Services
By Pinecone062
Last Updated Fri May 3 16:00:00 2019
1 Introduction
At its most fundamental, to deploy a web site on the Internet, one needs to meet four conditions:
- a “website” of HTML, CSS, and JavaScript;
- the “Internet”, i.e., a global network of interconnected devices;
- a “node” on the “Internet”, i.e., a server with an IP address;
- a way to load the “website” onto the “node”;
Given those four conditions, other Internet users can access the content via a client server (generally a browser) that has access to the Internet. The client contacts the server via its IP address and requests the content. The server sends the content to the requesting client, and the client assembles and displays the content according to the instructions given by the HTML, CSS, and JavaScript.
The first condition is all about web development, a huge topic all to itself. The second condition is about networking, also a huge topic unto itself. This guide is devoted to exploring the third and fourth conditions—getting content on a server connected to the Internet so others can access it.
This guide will explain not only the “how” of working with Internet servers, but also the “why” of it, how and why things work under the hood. It begins with an overview of the steps, with links to explanations throughout. Each level becomes more detailed the deeper one delves.
This guide will also discuss some of the tools involved with working with the Internet and servers operating on the Internet, such as:
dignslookup
2 The Server and the IP Address
The first step in this journey is getting access to a server connected to the Internet via an IP address. While there are numerous such services available, this guide looks at the following several means to this end:
The purpose of this guide is not just to provide a simple step-by-step guide on the “How” of it, but to explain the “How” in terms of the “Why” so that you can make informed decisions as to the best means for the job at hand.
Assuming you do not have direct access to the Internet via one of the Internet “backbones”1 yourself, you will be reliant on someone else who does. Therefore, in all cases, you sign up for an account with a service that has access to the Internet, and then you access that company’s server or servers with associated IP addresses. In most cases, you will not have any direct involvement with the machines or the assignment of the IP addresses, but you will be able to see the results of those steps having taken place.
3 General Overview of the Domain Name System
The Domain Name System (DNS) is a hierarchical and decentralized naming system for computers, services, or other resources connected to the Internet or a private network. It associates various information with domain names assigned to each of the participating entities. Most prominently, it translates more readily memorized domain names to the numerical IP addresses needed for locating and identifying computer services and devices with the underlying network protocols.
—Wikipedia
3.1 Introduction to Domain Names and the Domain Name System
While it is true that a client browser contacts a server via the server’s IP address (a string of numbers), it is also true that humans do not ordinarly work directly with IP addresses because they do not work well with strings of numbers. Therefore, the Internet community created the concept of the “Domain Name”, human-understandable phrases that map directly 1:1 to IP addresses, and the Domain Name System (“DNS”), a system that implements that mapping in a global, decentralized, efficient, and scalable manner.
Therefore, while not one of the four fundamental conditions to deploying a web site, an indispensible step in getting a web site up and accessible after getting access to a server with an IP address is associating that server with an assigned IP address with a registered “Domain Name” that uniquely maps to that address.
You obtain a domain name by registering a unique name with a Domain Name Registrar. The registration costs money on an annual basis, and must be figured into the overall cost of your web site. There are hundreds of Registrars of vastly different sizes, each offering different services and prices in association with the domain name registration. What is important for the discussion at hand, however, is obtaining a registered domain name that is yours to use, and that reflects the purpose and content of the web site it will represent.
Once you have that name, and a server with an IP address, you configure the domain name system to associate the domain name with the IP address, so that whenever a user of a browser types in the domain name, the browser is able to obtain the IP address to access the server.
Note that with many services, such as Amazon Web Services’ static web sites, Heroku, GitHub Pages, etc., you can deploy content without associating the IP address with your own domain name. What happens is that AWS assigns its own domain name to the site, and associates that domain name with the IP address of the hosting machine automatically. This process occurs in every case, and you are given the opportunity to assign your own domain name in place of the generated domain name if you wish. If you do not, then your content will be accessible via the generated name only. While this might be fine in some cases, the generated name is for all intends and purposes random and without meaning, and therefore not memorable or even easily usable, by general browsers of the Internet. For example, here is the generated domain name for a hypothetical web site hosted by AWS with a basic bucket named “examplebucket”:
http://examplebucket.s3-website-us-west-2.amazonaws.com/
3.2 The Doman Name System
DNS, or the Domain Name System, is a system that translates human readable
domain names (for example, www.amazon.com) to machine readable IP addresses
(for example, 192.0.2.44). It is designed to be decentralized, scalable, and
efficient to use from anywhere in the world.
All computers on the Internet find and communicate with one another by using
numbers. These numbers are known as IP addresses. When you open a web browser
and go to a website, you don’t have to remember and enter a long number.
Instead, you can enter a domain name like example.com and still end up in the
right place.
A DNS service such as Amazon Route 53 is a globally distributed service
that translates human readable names like www.example.com into the numeric IP
addresses like 192.0.2.1 that computers use to connect to each other. The
Internet’s DNS system works much like a phone book by managing the mapping
between names and numbers. DNS servers translate requests for names into IP
addresses, controlling which server an end user will reach when they type a
domain name into their web browser. These requests are called queries.
3.3 Domain Registry
A company that owns the right to sell domains that have a specific top-level domain. A domain registry also maintains the authoritative database for all of the domain names that have the same TLD. The registry’s database contains information such as contact information and the name servers for each domain.
3.4 Domain Registrar
A company that is accredited by ICANN (Internet Corporation for Assigned Names and Numbers) to process domain registrations for specific top-level domains (TLDs).
3.5 Domain Reseller
A company that sells domain names for registrars such as Amazon Registrar. Amazon Route 53 is a domain reseller for Amazon Registrar and for our registrar associate, Gandi.
3.6 Domain Name Format
A DNS Name is the name, such as example.com, that a user types in the address
bar of a web browser to access a website or a web application.
Domain names (including the names of domains, hosted zones, and records) consist of a series of labels separated by dots. Each label can be up to 63 bytes long. The total length of a domain name cannot exceed 255 bytes, including the dots. Amazon Route 53 supports any valid domain name.
Naming requirements depend on whether you’re registering a domain name or you’re specifying the name of a hosted zone or a record.
For domain name registration, a domain name can contain only the characters
a-z, 0-9, and – (hyphen). You can’t specify a hyphen at the beginning or
end of a label.
3.7 The Root Domain
The DNS is a hierarchical naming system for computers, services, or any
resource participating in the Internet. The top of that hierarchy is the root
domain. The root domain does not have a formal name and its label in the DNS
hierarchy is an empty string. All fully qualified domain names (FQDNs) on
the Internet can be regarded as ending with this empty string for the root
domain, and therefore ending in a full stop character (the label delimiter),
e.g., "www.example.com.". This is generally implied rather than explicit, as
modern DNS software does not actually require that the terminating dot be
included when attempting to translate a domain name to an IP address.
The root domain contains all top-level domains (TLD’s) of the Internet. As
of July 2015, it contains 1058 TLD’s, including 730 generic top-level domains
(gTLD’s) and 301 country code top-level domains (ccTLD’s) in the root
domain. In addition, the ARPA domain is used for technical name spaces in the
management of Internet addressing and other resources. A TEST domain is used
for testing internationalized domain names.
3.7.1 The Root Zone File
The root zone file is a small (about 2MB) data set whose publication is the
primary purpose of root name
servers2. The root zone file is at
the apex of a hierarchical distributed database called the Domain Name System
(DNS). This database is used by almost all Internet applications to translate
worldwide unique names such as www.wikipedia.org into other identifiers such
as IP addresses. The contents of the root zone file is a list of names and
numeric IP addresses of the authoritative DNS servers for all top-level
domains (TLD’s) such as com, org, edu, and the country code top-level
domains.
Verisign, which is the registry for the .com and .net top level domains,
discusses its zone file here. ICANN also has a portal at which registered
parties can access any zone file for any generic top-level domain (gTLD).
3.7.2 The Root Name Servers
The term “root name server” is generally used to describe the thirteen
well-known root name servers that implement the root name space domain for the
Internet’s official global implementation of the Domain Name System. There are
13 logical root name servers, operated by 12 independent organisations,
specified, with logical names in the form letter .root-servers.net, where
letter ranges from a to m. An informational homepage exists for every
logical server (except G-Root) under the Root Server Technical Operations
Association domain with web addresses in the form
http://<letter>.root-servers.org/, where <letter> ranges from a to m.
3.8 Top-Level Domains—TLDs
The last part of a domain name, such as .com, .org, or .ninja. There are
two types of top-level domains:
3.8.1 Generic top-level domains
These TLDs typically give users an idea of what they’ll find on the website. For example, domain names that have a TLD of .bike often are associated with websites for motorcycle or bicycle businesses or organizations.
3.8.2 Geographic top-level domains
These TLDs are associated with geographic areas such as countries or cities. Some registries for geographic TLDs have residency requirements, while others, such as .io, allow or even encourage use as a generic TLD.
For a list of the TLDs that you can use when you register a domain name with Route 53, see Domains That You Can Register with Amazon Route 53.
3.8.3 List of TLDs
3.9 DNS Name Servers
A DNS name server is a server that stores the DNS records for a domain; a DNS name server responds with answers to queries against its database. The most common types of records stored in the DNS database are for
- Start of Authority (SOA)
- IP addresses (A and AAAA)
- SMTP mail exchangers (MX)
- name servers (NS)
- pointers for reverse DNS lookups (PTR)
- domain name aliases (CNAME).
A name server is a computer application that implements a network service for providing responses to queries against a directory service. It translates an often humanly meaningful, text-based identifier to a system-internal, often numeric identification or addressing component. This service is performed by the server in response to a service protocol request.
—Wikipedia
- Authoritative DNS
An authoritative DNS service provides an update mechanism that developers use to manage their public DNS names. It then answers DNS queries, translating domain names into IP address so computers can communicate with each other. Authoritative DNS has the final authority over a domain and is responsible for providing answers to recursive DNS servers with the IP address information.
Amazon Route 53 is an authoritative DNS system.
- Recursive DNS
Clients typically do not make queries directly to authoritative DNS services. Instead, they generally connect to another type of DNS service known as a resolver, or a recursive DNS service. A recursive DNS service acts like a hotel concierge: while it doesn’t own any DNS records, it acts as an intermediary which can get the DNS information on your behalf. If a recursive DNS has the DNS reference cached, or stored for a period of time, then it answers the DNS query by providing the source or IP information. If not, it passes the query to one or more authoritative DNS servers to find the information.
Verisign offers a free, public recursive domain name server at Public DNS.

Assuming the resolver has no cached records to accelerate the process, the
resolution process starts with a query to one of the root servers. In
typical operation, the root servers do not answer directly, but respond with a
referral to more authoritative servers, e.g., a query for www.wikipedia.org
is referred to the org servers. The resolver now queries the servers
referred to, and iteratively repeats this process until it receives an
authoritative answer. The diagram illustrates this process for the host that
is named by the fully qualified domain name “www.wikipedia.org”.
3.10 How a DN Server Routes Traffic
The following diagram gives an overview of how recursive and authoritative DNS services work together to route an end user to your website or application.

- A user opens a web browser, enters
www.example.comin the address bar, and presses Enter. - The request for
www.example.comis routed to a DNS resolver, which is typically managed by the user’s Internet service provider (ISP), such as a cable Internet provider, a DSL broadband provider, or a corporate network. - The DNS resolver for the ISP forwards the request for
www.example.comto a DNS root name server. - The DNS resolver for the ISP forwards the request for
www.example.comagain, this time to one of the TLD name servers for.comdomains. The name server for.comdomains responds to the request with the names of the four Amazon Route 53 name servers that are associated with theexample.comdomain. - The DNS resolver for the ISP chooses an Amazon Route 53 name server and
forwards the request for
www.example.comto that name server. - The Amazon Route 53 name server looks in the
example.comhosted zone for thewww.example.comrecord, gets the associated value, such as the IP address for a web server,192.0.2.44, and returns the IP address to the DNS resolver. - The DNS resolver for the ISP finally has the IP address that the user
needs. The resolver returns that value to the web browser. The DNS resolver
also caches (stores) the IP address for
example.comfor an amount of time that you specify so that it can respond more quickly the next time someone browses to example.com. For more information, see time to live (TTL). - The web browser sends a request for
www.example.comto the IP address that it got from the DNS resolver. This is where your content is, for example, a web server running on an Amazon EC2 instance or an Amazon S3 bucket that’s configured as a website endpoint. - The web server or other resource at
192.0.2.44returns the web page forwww.example.comto the web browser, and the web browser displays the page.
3.11 Domain Name Registration
https://docs.aws.amazon.com/Route53/latest/DeveloperGuide/domain-register.html
When a domain is registered with a domain name registrar, the zone administrator provides the list of name servers (typically at least two, for redundancy[7]) that are authoritative for the zone that contains the domain.
—Wikipedia
If you want to create a website or a web application, you start by registering
the name of your website, known as a domain name. Your domain name is the
name, such as example.com, that your users enter in a browser to display your
website.
4 Deploy Web Sites using Amazon Web Services
Amazon Web Services (“AWS”) is a huge conglomeration of services devoted to all thrings “Cloudy” and “Webby”. This guide is limited to only a small corner of that universe, in particular to those areas touching upon:
- domain names and domain name services
- static web sites
- “smallish” dynamic web sites
- single-page apps of the React kind
The basic services involved will be:
- Identity and Account Management (IAM)
- Route 53 (for domain name registration and domain name services)
- Simple Storage Service (S3) (for hosting static content and single page apps)
- Elastic Cloud Compute (EC2) (for hosting dynamic content and databases)
- Amazon Lightsail (for hosting dynamic content efficiently and cheaply)
- CloudFront (for https domain name functionality on static sites)
- Certificate Manager (for https certificates)
4.1 Article—What AWS service should you use to publish a web site?
There are at least five different services you can use to publish a web site on AWS:
Amazon S3 + Amazon Cloudfront
https://adrianhall.github.io/aws/which-aws-service-for-hosting/#amazon-s3--amazon-cloudfront
- AWS Amplify Console https://adrianhall.github.io/aws/which-aws-service-for-hosting/#aws-amplify-console
Amazon Lightsail
https://adrianhall.github.io/aws/which-aws-service-for-hosting/#amazon-lightsail
AWS Elastic Beanstalk
https://adrianhall.github.io/aws/which-aws-service-for-hosting/#aws-elastic-beanstalk
Do-it-yourself compute / storage / network stack
https://adrianhall.github.io/aws/which-aws-service-for-hosting/#do-it-yourself
https://adrianhall.github.io/aws/which-aws-service-for-hosting/#there-are-options
Which one of these do you choose? Well, “it depends” is a great answer to this question, but I hope that this article will demystify the strengths of each choice and give you a roadmap to make a choice.
This article is not designed for the person who knows a lot about AWS services. It glosses over a lot of details and those details may be very relevant to your specific use case. However, if you are lost in the myriad choices that AWS provides, hopefully this will provide some guidance on where to concentrate your research.
I have also deliberately not discussed pricing. The pricing models for each combination of services are different and inevitably will depend on how you expect the site to be used. You can and should do a comparison of the various options based on your specific use case. Pricing information is available for all options on the AWS website.
4.1.1 Amazon S3 + Amazon CloudFront
If your web site is just a collection of HTML, CSS, and JavaScript with no other dependencies, and you receive this from a marketing or design firm, you can just drag and drop the files onto your S3 bucket and get them deployed easily. This option may be for you. It’s simple to understand—you just publish your files to the S3 bucket and CloudFront picks them up and distributes them worldwide, also handling things like HTTPS for you.
I find that this is becoming less and less appealing, given the availability of AWS Amplify Console, but for those basic sites, this is probably the most cost effective way of getting a web site up and runningt.
Best for: Pre-packaged static sites provided by marketing organizations that are deployed via drag and drop.
4.1.2 AWS Amplify Console
As the newcomer service, the AWS Amplify Console is an awesome continuous deployment (CD) platform for your web site. It has built in support for static site generators such as Gatsby, Jekyll, and Hugo, and support for JavaScript single page applications written in a variety of frameworks like React, Angular, or Vue. The AWS Amplify Console especially shines if you wish to deploy a SPA with a serverless backend built with the AWS Amplify CLI.
The service is very hands off — check your code into your source code repository (GitHub, CodeCommit, etc.) and a deployment will happen. Worldwide distribution happens via Amazon CloudFront so your app is responsive and planet scale.
Best for: Static site generators, JavaScript based single page applications.
4.1.3 Amazon Lightsail
If your app relies on a web language backend (like Ruby or PHP) or you use a common web site platform (like WordPress or Magento), then you might want to choose Amazon Lightsail. Underneath, your Lightsail instance is comprised of virtual machines that run the appropriate software. You can run both Linux and Windows instances with Lightsail. It can be considered a crafted and opinionated set of virtual machines specifically designed around web applications. You get the ability to set up DNS, static IP addresses, load balancers, and connectivity to a VPC to access private resources like RDS hosted databases.
Best for: Common web stacks like LAMP, MEAN, and PHP, or common web applications like WordPress, MediaWiki, and Magento.
4.1.4 AWS Elastic Beanstalk
On the surface, you will find a lot of similarities between Amazon Lightsail and AWS Elastic Beanstalk with EC2 instances. They both run exactly the same web application sets. They both run virtual machines. However, AWS Elastic Beanstalk can run within a VPC, which means you can run the web applications in an “internal only” configuration (with no connection to the Internet. For example, running MediaWiki as an internal-only employee information service). You also get a whole host of flexibility in terms of settings that you don’t get with Lightsail. One of the under-utilized features is blue-green deployments, which allows you to deploy and warm up a replacement web application while the existing web application continues to run. You can also configure the underlying OS that is running any way you need to, which opens up possibilities that aren’t available in the other options.
Best for: Your most challenging enterprise apps where access to the underlying OS is required.
4.1.5 Do it yourself
Most of the time, when I can’t get away with a serverless backend and AWS Amplify console, I turn to a Docker container to provide the service. This docker container can be deployed via a CI/CD pipeline, scaled with Amazon ECS and managed as part of a complex stack. Doing things yourself means the maximum flexibility and control of the environment, but also the maximum amount of time spent managing the environment.
Best for: Your most challenging enterprise apps where you can use a variety of AWS services to augment your service offering.
4.1.6 There are options
I’m sure there are other options available. AWS is a very flexible cloud with lots of options for everything you might want to run. I try to simplify what I need to manage by choosing the right tool for the application I am going to run. From basic static sites to the latest SPA applications with planetary scale backends, there is an option for each and every application you run.
4.2 AWS Accounts
You sign up for accss to Amazon Web Services to obtain a root account and root account credentials. For this step, you use your email address and a password. Then you create one or more user accounts called IAM user accounts and IAM user account credentials, which you use for everyday access to AWS services. For this step, you create a user name and a password.
Since the root account has unlimited access and control to all aspects of your AWS account, it is important to limit yourself through use of the IAM accounts on a day-to-day basis, and to use the root account credentials only when absolutely necessary. You access AWS via an IAM user through a special URL obtained during the signup process.
4.2.1 The Root Account
Sign Up for an AWS Account
When you sign up for AWS, your AWS account is automatically signed up for all services in AWS. You are charged only for the services that you use.
- Open https://aws.amazon.com/, and then choose
Create an AWS Account. - Part of the sign-up procedure involves receiving a phone call and entering a verification code using the phone keypad.
- Note your AWS account number, because you’ll need it later.
Access AWS Via the Root Account
To access the AWS Management Console for the first time, you provide an email address and a password.
- This combination of your email address and password is called your root identity or root account credentials.
- After you access your account for the first time, we strongly recommend that you don’t use your root account credentials again for everyday use. Instead, you should create new credentials by using AWS Identity and Access Management (IAM) to create your IAM User account.
4.2.2 The IAM User Account
Next you will create a user account for yourself known as an IAM user, and then add the IAM user to an IAM group with administrative permissions or grant the IAM user administrative permissions. Thereafter you then can access AWS using a special URL and the credentials for the IAM user. You also can add other IAM users later, and restrict their access to specified resources in the account.
Create an IAM User
Perform the following procedures to create a group for administrators, create an IAM user, and then add the IAM user to the administrators group.
- Use your AWS account email address and password to sign in as the AWS account root user to the IAM console.
- In the navigation pane of the console, choose
Users, and then chooseAdd user. - For
User name, typeAdministrator. - Select the check box next to AWS Management Console access, select
Custom
    password
, and then type the new user’s password in the text box. - Choose
Next: Permissions. - On the
Set permissionspage, chooseAdd user to group. - Choose
Create group. - In the
Create groupdialog box, forGroup nametypeAdministrators. - For
Filter policies, select the check box forAWS managed - job function. - In the policy list, select the check box for
AdministratorAccess. Then chooseCreate group. - Back in the list of groups, select the check box for your new group. Choose
Refreshif necessary to see the group in the list. - Choose
Next: Tagsto add metadata to the user by attaching tags as key-value pairs. - Choose
Next: Reviewto see the list of group memberships to be added to the new user. When you are ready to proceed, chooseCreate user.
You can use this same process to create more groups and users, and to give your users access to your AWS account resources.
To learn about using policies to restrict users’ permissions to specific AWS resources, go to Access Management and Example Policies.
Sign in as an IAM User
- Sign out of the AWS console.
Sign in by using the following URL, where
your_aws_account_idis your AWS account number without the hyphens.https://your_aws_account_id.signin.aws.amazon.com/console/
- Enter the IAM user name (not your email address) and password that you just
created. When you’re signed in, the navigation bar displays
"your_user_name @ your_aws_account_id".
Create an Account Alias
If you don’t want the URL for your sign-in page to contain your AWS account ID, you can create an account alias.
- On the IAM console, choose
Dashboardin the navigation pane. - On the dashboard, choose
Customizeand enter an alias such as your company name. - Sign out of the AWS console.
Sign in by using the following URL:
https://your_account_alias.signin.aws.amazon.com/console/
To verify the sign-in link for IAM users for your account, open the IAM console and check under IAM users sign-in link on the dashboard.
Set Up Multi-factor Authentication
For increased security, set up multi-factor authentication (MFA) for your account. Everytime you log into your account, you will be required to enter a unique authentication code from an approved authentication device.
- Under your account name on the toolbar, click on
My Security
   Credentials
. - Click on
Manage MFA Device
4.2.3 Access Your AWS Account
You use AWS services by using any of the following options:
- AWS Management Console
- API for each service
- AWS Command Line Interface (AWS CLI)
- AWS Tools for Windows PowerShell
- AWS SDKs
- AWS Console Mobile Application
Access Your Account Via the AWS Management Console
Online access to all AWS services can be done through the AWS Management Console, which loads after signing in.
Access the API, AWS CLI, AWS Tools for Windows PowerShell, or the AWS SDKs
To use the API, the AWS CLI, AWS Tools for Windows PowerShell, or the AWS SDKs, you must create access keys. These keys consist of an access key ID and secret access key, which are used to sign programmatic requests that you make to AWS.
To create the keys, you sign in to the AWS Management Console. We strongly recommend that you sign in with your IAM user credentials instead of your root credentials.
- Click on your account name on the toolbar and go to
My Security Credentials. - Click on
Create Access Key.
The keys will be saved in ~/.aws/credentials.
4.2.4 Amazon Pricing
Free Tier
Always Free
These free tier offers do not expire and are available to all AWS customers.
- Fast and flexible NoSQL database with seamless scalability
- 25 GB of storage
- 25 provisioned Write Capacity Units (WCU)
- 25 provisioned Read Capacity Units (RCU)
- Enough to handle up to 200M requests per month.
Compute service that runs your code in response to events and automatically manages the compute resources
- 1,000,000 free requests per month
- Up to 3.2 million seconds of compute time per month
Fast, flexible, fully managed push messaging service
- 1,000,000 Publishes
- 100,000 HTTP/S Deliveries
- 1,000 Email Deliveries
Monitoring for AWS cloud resources and applications
- 10 Custom Metrics and 10 Alarms
- 1,000,000 API Requests
- 5GB of Log Data Ingestion and 5GB of Log Data Archive
- 3 Dashboards with up to 50 Metrics Each per Month
Amazon Chime is a modern unified communications service that offers frustration-free meetings with exceptional audio and video.
- Amazon Chime Basic subscription is free to use for as long you’d like
- Unlimited usage of Amazon Chime Basic
Mobile user identity and synchronization
- The Your User Pool feature has a free tier of 50,000 MAUs each month
- 10 GB of cloud sync storage. Expires 12 months after sign-up.
- 1,000,000 sync operations per month. Expires 12 months after sign-up.
Long-term, secure, durable object storage
- 10 GB of Amazon Glacier data retrievals per month for free. The free tier allowance can be used at any time during the month and applies to Standard retrievals
Discover, Classify, and Protect Your Data
- 1 GB processed by the content classification engine
- 100,000 events
Cost-effective email service in the Cloud
- 62,000 Outbound Messages per month to any recipient when you call Amazon SES from an Amazon EC2 instance directly or through AWS Elastic Beanstalk.
- 1,000 Inbound Messages per month
Scalable queue for storing messages as they travel between computers
- 1,000,000 Requests
Task coordination and state management service for Cloud applications
- 10,000 Activity Tasks
- 30,000 Workflow-Days
- 1,000 Initiated Executions
Fully managed build service that builds and tests code in the cloud
- 100 build minutes per month of build.general1.small compute type usage
Highly scalable, managed source control service
- 5 active users per month
- 50 GB-month of storage per month
- 10,000 Git requests per month
Continuous delivery service for fast and reliable application updates
- 1 Active Pipeline per month
Migrate databases with minimal downtime
- 750 Hours of Amazon DMS Single-AZ dms.t2.micro instance usage
- 50 GB of included General Purpose (SSD) storage
Simple, flexible, and cost-effective extract, transform, and load (ETL) service
- 1 Million objects stored in the AWS Glue Data Catalog
- 1 Million requests made per month to the AWS Glue Data Catalog
AWS Key Management Service is a managed service that provides easy encryption with administrative controls
- 20,000 free requests per month
Set rules to manage, discover, and report third-party license usage proactively
- Unlimited - set as many rules as you want to manage third-party license usage
- Use AWS License Manager on free instances without incurring charges. Normal AWS rates are applied for applications that require more resources than the default environment provides.
Coordinate components of distributed applications
- 4,000 state transitions per month
Hybrid cloud storage with seamless local integration and optimized data transfer
- First 100 GB per account is free
- No transfer charges into AWS
Review your architecture and adopt best practices with the AWS Well-Architected Tool
- To use this free tool, define your workload, and answer a set of questions across the five pillars of the Well Architected Framework. The AWS Well-Architected Tool then provides a plan on how to architect for the cloud using AWS best practices.
Analyze and debug your applications
- 100,000 traces recorded per month
- 1,000,000 traces scanned or retrieved per month
12 Months Free
Enjoy these offers for 12-months following your initial sign-up date to AWS.
Resizable compute capacity in the Cloud
- 750 hours per month of Linux, RHEL, or SLES t2.micro instance usage
- 750 hours per month of Windows t2.micro instance usage
Secure, durable, and scalable object storage infrastructure
- 5 GB of Standard Storage
- 20,000 Get Requests
- 2,000 Put Requests
Managed Relational Database Service for MySQL, PostgreSQL, MariaDB, Oracle BYOL, or SQL Server
- 750 Hours per month of db.t2.micro database usage (applicable DB engines)
- 20 GB of General Purpose (SSD) database storage
- 20 GB of storage for database backups and DB Snapshots
Publish, maintain, monitor, and secure APIs at any scale
- 1 Million API Calls Received per month
Fully-managed, cloud-native directory building service for data with multiple hierarchies
- 1GB of storage per month
- 10,000 combined strongly consistent read API calls and write API calls per month
- 100,000 eventually consistent read API calls per month
Web service to distribute content to end users with low latency and high data transfer speeds
- 50 GB of Data Transfer Out
- 2,000,000 HTTP or HTTPS Requests
Continuously trained and fully managed natural language processing (NLP)
- 50K units of text (5M characters) for each API per month
- 5 Topic Modeling Jobs up to 1MB each per month for the first 12 months
Amazon Connect is a simple to use, cloud-based contact center that scales to support any size business
- 90 minutes per month of Amazon Connect usage
- A local direct inward dial (DID) number for the region*
- 30 minutes per month of local inbound DID calls*
- 30 minutes per month of local outbound calls*
- For US regions, a toll-free number for use per month and 30 minutes per month of US inbound toll-free calls*
Simple, scalable, shared file storage service for Amazon EC2 instances
- 5GB of storage
Persistent, durable, low-latency block-level storage volumes for EC2 instances
- 30 GiB of Amazon EBS: any combination of General Purpose (SSD) or Magnetic
Store and retrieve Docker images
- 500 MB-month of Storage
Fully managed media transcoding service
- 20 Minutes of Audio Transcoding
Web service that makes it easy to deploy, operate, and scale an in-memory cache in the Cloud
- 750 Hours of cache.t2micro Node usage
Managed service that makes it easy to deploy, operate, and scale Elasticsearch clusters in the AWS Cloud
- 750 hours per month of a single-AZ t2.small.elasticsearch instance
- 10GB per month of optional EBS storage (Magnetic or General Purpose)
Simple, fast, cost-effective dedicated game server hosting.
- 125 hours per month of Amazon GameLift c4.large.gamelift On-Demand instance usage
- 50 GB EBS General Purpose (SSD) storage
Build Voice and Chat Text Chatbots
- 10,000 text requests per month
- 5,000 speech requests per month
Amazon MQ is a managed message broker service for Apache ActiveMQ
- 750 hours of a single-instance mq.t2.micro broker per month
- 1GB of storage per month
Targeted Push Notifications for Mobile Apps
- 5,000 free targeted users per month
- 1,000,000 free push notifications per month
- 100,000,000 events per month
Turn text into lifelike speech
- 5M characters per month
Deep learning-based image recognition service
- Analyze 5,000 images per month
- Store up to 1,000 face metadata per month
Build and run virtual reality, augmented reality, and 3D applications
- 50MB published scene that receives 100 views per month for free in the first year
Add speech-to-text capability to your applications with automatic speech recognition
- 60 minutes per month
Fast, high-quality, and affordable neural machine translation
- 2 million characters per month
Build, deploy, and host cloud-powered modern web app
- Build & Deploy - 1000 build minutes per month
- Hosting - 5 GB stored per month & 15 GB served per month
Orchestration for data-driven workflows
- 3 Low Frequency Preconditions
- 5 Low Frequency Activities
Local compute, messaging, data caching, and sync capabilities for connected devices
- 3 devices for free
Connect devices to the cloud
- 250,000 Messages (published or delivered) per month
Onboard, organize, monitor, and remotely manage connected devices at scale
- 50 remote actions per month
Configuration management with Chef server and Chef Automate
- 7,500 node hours (which equals 10 nodes) per month
Configuration management with Puppet Enterprise
- 7,500 node hours (which equals 10 nodes) per month
AWS RoboMaker makes it easy to develop, simulate, and deploy intelligent robotics applications at scale
- 25 SU-hours for free
AWS Cloud Optimization Expert
- 4 best-practice checks on performance and security (service limits, security groups, IAM, and MFA)
Automatic distribution of incoming application traffic across multiple Amazon EC2 instances
- 750 Hours per month shared between Classic and Application load balancers
- 15 GB of data processing for Classic load balancers
- 15 LCUs for Application load balancers
Trials
Short-term free trial offers are available through many different software solutions.
Fully managed platform to build, train, and deploy machine learning models
- 250 hours per month of t2.medium notebook usage for the first two months
- 50 hours per month of m4.xlarge for training for the first two months
- 125 hours per month of m4.xlarge for hosting for the first two months
Virtual Private Servers made easy! Everything you need to jumpstart your project on AWS with compute, storage, and networking.
- 30-days free (750 hours per month)
- Try the $3.50 USD Lightsail plan free for one month when using Linux/Unix
- Try the $8 USD plan free for one month when using Lightsail for Microsoft Windows Server
Intelligent threat detection and continuous monitoring to protect your AWS accounts and workloads.
- 30-day Free Trial
A natural language processing service that makes it easy to use machine learning to extract relevant medical information from unstructured text
- 25k units of text (2.5M characters) for the first 3 months from first use of the service
- Can be used for both the Medical Named Entity and Relationship Extraction (NERe) API and the Protected Health Information Data Extraction and Identification (PHId) API.
Automated security assessment service to help improve the security and compliance of applications deployed on AWS
- 90-day Free Trial or 250 agent-assessments. Which ever occurs first.
Fast, simple, cost-effective data warehousing
- Two-month free trial
- 750 DC2.Large hours per month for 2 months
Build highly-accurate training datasets quickly, while reducing data labeling costs by up to 70%
- First 500 objects labeled per month for the first two months after first use of SageMaker (excluding any additional costs incurred by using a labeling vendor or Amazon Mechanical Turk)
Amazon WorkDocs is a secure, fully managed, content creation, file collaboration service that runs on AWS
- 30-day Free Trial
- with 1 TB of storage per user for up to 50 users
- Amazon WorkSpaces users get Amazon WorkDocs with 50 GB of storage for no additional charge
Amazon WorkDocs & WorkSpaces bundle is a managed, content creation, file collaboration, secure cloud desktop service.
- 50 GB of storage per WorkSpaces user
- Upgrade to 1 TB of storage for discounted rate of $2 per WorkSpaces user per month
- Access to all WorkDocs features
Test your iOS, Android and FireOS apps on real devices in the AWS cloud
- Free one-time trial of 250 Device Minutes
Overview
AWS offers you a pay-as-you-go approach for pricing for over 120 cloud services. With AWS you pay only for the individual services you need, for as long as you use them, and without requiring long-term contracts or complex licensing. AWS pricing is similar to how you pay for utilities like water and electricity. You only pay for the services you consume, and once you stop using them, there are no additional costs or termination fees.
Pay-as-you-go
Pay-as-you-go allows you to easily adapt to changing business needs without overcommitting budgets and improving your responsiveness to changes. With a pay-as-you-go model, you can adapt your business depending on need and not on forecasts, reducing the risk of overpositioning or missing capacity.
Save when you reserve
For certain services like Amazon EC2 and Amazon RDS, you can invest in reserved capacity. With Reserved Instances, you can save up to 75% over equivalent on-demand capacity. When you buy Reserved Instances, the larger the upfront payment, the greater the discount.
Pay less by using more
With AWS, you can get volume based discounts and realize important savings as your usage increases. For services such as S3, pricing is tiered, meaning the more you use, the less you pay per GB. AWS also gives you options to acquire services that help you address your business needs.
Services Pricing
Compute
There are four ways to pay for Amazon EC2 instances:
On-Demand
With On-Demand instances, you pay for compute capacity by per hour or per second depending on which instances you run. No longer-term commitments or upfront payments are needed. You can increase or decrease your compute capacity depending on the demands of your application and only pay the specified per hourly rates for the instance you use.
Reserved Instances
Reserved Instances provide you with a significant discount (up to 75%) compared to On-Demand instance pricing. In addition, when Reserved Instances are assigned to a specific Availability Zone, they provide a capacity reservation, giving you additional confidence in your ability to launch instances when you need them.
Spot instances
Amazon EC2 Spot instances allow you to request spare Amazon EC2 computing capacity for up to 90% off the On-Demand price.
Dedicated Hosts
A Dedicated Host is a physical EC2 server dedicated for your use. Dedicated Hosts can help you reduce costs by allowing you to use your existing server-bound software licenses, including Windows Server, SQL Server, and SUSE Linux Enterprise Server (subject to your license terms), and can also help you meet compliance requirements.
Per Second Billing
With per-second billing, you pay for only what you use. It takes cost of unused minutes and seconds in an hour off of the bill, so you can focus on improving your applications instead of maximizing usage to the hour. Especially, if you manage instances running for irregular periods of time, such as dev/testing, data processing, analytics, batch processing and gaming applications, can benefit.
Linux/Unix and Windows pricing; the following pricing is for Linux/Unix only.
You can try the $3.50 USD Lightsail plan free for one month (up to 750 hours), the $8 USD plan free for one month when using Lightsail for Microsoft Windows Server, or the $15 USD free for one month when using the Managed databases plan. Choose appropriate plan when you launch your first Lightsail server, and we will credit one free month to your account.
Included:
- Static IP address
- DNS management
- Server monitoring
- SSH terminal access (Linux/Unix)
- Intuitive management console
- RDP access (Windows)
- Secure key management
Pricing:
- $3.50/month
- 512 MB Memory
- 1 Core Processor
- 20 GB SSD Disk
- 1 TB Transfer
- $5.00/month
- 1 GB Memory
- 1 Core Processor
- 40 GB SSD Disk
- 2 TB Transfer
- $10.00/month
- 2 GB Memory
- 1 Core Processor
- 60 GB SSD Disk
- 3 TB Transfer
- $20.00/month
- 4 GB Memory
- 2 Core Processor
- 80 GB SSD Disk
- 4 TB Transfer
- $40.00/month
- $80.00/month
- $160.00/month
Managed databases pricing
Choose between our standard plan or our high availability plan (includes extra instances for redundancy or failovers).
- Standard plan
- $15
- $30
- $60
- $115
- High Availability plan
- Memory (RAM)
- 1 GB
- 2 GB
- 4 GB
- 8 GB
- Compute capacity
- SSD storage
- 40 GB
- 80 GB
- 120 GB
- 240 GB
- Data transfer allowance
- 100 GB
- 100 GB
- 100 GB
- 200 GB
- Data encrypted
- No
- Yes
- Yes
- Yes
- Standard plan
There are two different charge models for Amazon Elastic Container Service (ECS).
- Fargate Launch Type Model
- With Fargate, you pay for the amount of vCPU and memory resources that your containerized application requests. vCPU and memory resources are calculated from the time your container images are pulled until the Amazon ECS Task* terminates, rounded up to the nearest second. A minimum charge of 1 minute applies.
- EC2 Launch Type Model
- There is no additional charge for EC2 launch type. You pay for AWS resources (e.g. EC2 instances or EBS volumes) you create to store and run your application. You only pay for what you use, as you use it; there are no minimum fees and no upfront commitments.
With AWS Lambda, you pay only for what you use. You are charged based on the number of requests for your functions and the duration, the time it takes for your code to execute.
Lambda counts a request each time it starts executing in response to an event notification or invoke call, including test invokes from the console. You are charged for the total number of requests across all your functions.
Duration is calculated from the time your code begins executing until it returns or otherwise terminates, rounded up to the nearest 100ms. The price depends on the amount of memory you allocate to your function.
The Lambda free tier includes 1M free requests per month and 400,000 GB-seconds of compute time per month. The memory size you choose for your Lambda functions determines how long they can run in the free tier. The Lambda free tier does not automatically expire at the end of your 12 month AWS Free Tier term, but is available to both existing and new AWS customers indefinitely.
You may incur additional charges if your Lambda function utilizes other AWS services or transfers data. For example, if your Lambda function reads and writes data to or from Amazon S3, you will be billed for the read/write requests and the data stored in Amazon S3.
Data transferred “in” to and “out” of your AWS Lambda functions from outside the region the function executed in will be charged at the EC2 data transfer rates as listed here under “Data transfer”.
Data transferred between Amazon S3, Amazon Glacier, Amazon DynamoDB, Amazon SES, Amazon SQS, Amazon Kinesis, Amazon ECR, Amazon SNS, or Amazon SimpleDB and AWS Lambda functions in the same AWS Region is free.
The usage of VPC or VPC peering with AWS Lambda functions will incur additional charges.
- Requests
First 1M requests per month are free.
$0.20 PER 1M REQUESTS THEREAFTER
- Duration
First 400,000 GB-seconds per month, up to 3.2M seconds of compute time, are free.
$0.00001667 FOR EVERY GB-SECOND USED THEREAFTER
Storage
Pay only for what you use. There is no minimum fee. Estimate your monthly bill using the AWS Simple Monthly Calculator.
Database
DynamoDB charges for reading, writing, and storing data in your DynamoDB tables, along with any optional features you choose to enable. DynamoDB has two capacity modes and those come with specific billing options for processing reads and writes on your tables: on-demand and provisioned. Click the following links to learn more about the billing options for each capacity mode.
- Pricing for on-demand capacity mode
With on-demand capacity mode, DynamoDB charges you for the data reads and writes your application performs on your tables. You do not need to specify how much read and write throughput you expect your application to perform because DynamoDB instantly accommodates your workloads as they ramp up or down.
On-demand capacity mode might be best if you:
- Create new tables with unknown workloads.
- Have unpredictable application traffic.
- Prefer the ease of paying for only what you use.
- Pricing for provisioned capacity mode
With provisioned capacity mode, you specify the number of reads and writes per second that you expect your application to require. You can use auto scaling to automatically adjust your table’s capacity based on the specified utilization rate to ensure application performance while reducing costs.
Provisioned capacity mode might be best if you:
- Have predictable application traffic.
- Run applications whose traffic is consistent or ramps gradually.
- Can forecast capacity requirements to control costs.
Migration
Networking and Delivery Content
Cost Optimization
Optimize your costs when using AWS
By following a few simple steps, you can effectively control your AWS costs: 1) Right-size your services to meet capacity needs at the lowest cost 2) Save money when you reserve 3) Use the spot market 4) Monitor and track service usage 5) Use Cost Explorer to optimize savings.
SIMPLE MONTHLY CALCULATOR
4.2.5 Amazon Route 53
Amazon Route 53 is a highly available and scalable Domain Name System (DNS) web service.
You can use Route 53 to perform three main functions in any combination:
- domain registration
- DNS routing
- health checking
If you choose to use Route 53 for all three functions, perform the steps in this order:
Register domain names
Your website needs a name, such as
example.com. Route 53 lets you register a name for your website or web application, known as a domain name.- for an overview, see How Domain Registration Works.
- for a procedure, see Registering a New Domain.
- For a tutorial that takes you through registering a domain and creating a simple website in an Amazon S3 bucket, see Getting Started with Amazon Route 53.
Route internet traffic to the resources for your domain
When a user opens a web browser and enters your domain name (
example.com) or subdomain name (acme.example.com) in the address bar, Route 53 helps connect the browser with your website or web application.- For an overview, see How Internet Traffic Is Routed to Your Website or Web Application.
- For procedures, see Configuring Amazon Route 53 as Your DNS Service.
Check the health of your resources
Route 53 sends automated requests over the internet to a resource, such as a web server, to verify that it’s reachable, available, and functional. You also can choose to receive notifications when a resource becomes unavailable and choose to route internet traffic away from unhealthy resources.
- For an overview, see How Amazon Route 53 Checks the Health of Your Resources.
- For procedures, see Creating Amazon Route 53 Health Checks and Configuring DNS Failover.
Route 53 Domain Name System Concepts
Alias record
A type of record that you can create with Amazon Route 53 to route traffic to AWS resources such as Amazon CloudFront distributions and Amazon S3 buckets.
Authoritative Name Server
A name server that has definitive information about one part of the Domain Name System (DNS) and that responds to requests from a DNS resolver by returning the applicable information. Route 53 name servers are the authoritative name servers for every domain that uses Route 53 as the DNS service. The name servers know how you want to route traffic for your domain and subdomains based on the records that you created in the hosted zone for the domain.
DNS query
Usually a request that is submitted by a device, such as a computer or a smart phone, to the Domain Name System (DNS) for a resource that is associated with a domain name.
DNS resolver
A DNS server, often managed by an internet service provider (ISP), that acts as an intermediary between user requests and DNS name servers. When you open a browser and enter a domain name in the address bar, your query goes first to a DNS resolver. The resolver communicates with DNS name servers to get the IP address for the corresponding resource, such as a web server. A DNS resolver is also known as a recursive name server because it sends requests to a sequence of authoritative DNS name servers until it gets the response (typically an IP address) that it returns to a user’s device, for example, a web browser on a laptop computer.
Domain Name System
A worldwide network of servers that help computers, smart phones, tablets, and other IP-enabled devices to communicate with one another. The Domain Name System translates easily understood names such as example.com into the numbers, known as IP addresses, that allow computers to find each other on the internet.
Hosted zone
A container for records, which include information about how you want to
route traffic for a domain (such as example.com) and all of its subdomains
(such as www.example.com, retail.example.com, and
seattle.accounting.example.com). A hosted zone has the same name as the
corresponding domain.
IP address
A number that is assigned to a device on the internet—such as a laptop, a smart phone, or a web server—that allows the device to communicate with other devices on the internet.
Name servers
Servers in the Domain Name System (DNS) that help to translate domain names into the IP addresses that computers use to communicate with one another. Name servers are either recursive name servers (also known as DNS resolver) or authoritative name servers.
Private DNS
A local version of the Domain Name System (DNS) that lets you route traffic for a domain and its subdomains to Amazon EC2 instances within one or more Amazon virtual private clouds (VPCs).
Recursive name server
DNS Record
An object in a hosted zone that you use to define how you want to route traffic for the domain or a subdomain.
Reusable delegation set
A set of four authoritative name servers that you can use with more than one hosted zone. By default, Route 53 assigns a random selection of name servers to each new hosted zone. To make it easier to migrate DNS service to Route 53 for a large number of domains, you can create a reusable delegation set and then associate the reusable delegation set with new hosted zones.
You create a reusable delegation set and associate it with a hosted zone programmatically; using the Route 53 console isn’t supported. For more information, see CreateHostedZone and CreateReusableDelegationSet in the Amazon Route 53 API Reference. The same feature is also available in the AWS SDKs, the AWS Command Line Interface, and AWS Tools for Windows PowerShell.
Routing policy
A setting for records that determines how Route 53 responds to DNS queries.
Use to route internet traffic to a single resource that performs a given function for your domain, for example, a web server that serves content for the example.com website.
Subdomain
A domain name that has one or more labels prepended to the registered domain
name. For example, if you register the domain name example.com, then
www.example.com is a subdomain. If you create the hosted zone
accounting.example.com for the example.com domain, then
seattle.accounting.example.com is a subdomain.
To route traffic for a subdomain, create a record that has the name that you
want, such as www.example.com, and specify the applicable values, such as the
IP address of a web server.
Time-to-live—TLD
The amount of time, in seconds, that you want a DNS resolver to cache (store) the values for a record before submitting another request to Route 53 to get the current values for that record.
Register a New Domain Name on Route 53
Overview
Here’s an overview of how you register a domain name with Amazon Route 53:
You choose a domain name and confirm that it’s available, meaning that no one else has registered the domain name that you want.
For a list of the top-level domains that Route 53 supports, see Domains That You Can Register with Amazon Route 53.
You register the domain name with Route 53. When you register a domain, you provide names and contact information for the domain owner and other contacts.
When you register a domain with Route 53, the service automatically makes itself the DNS service for the domain by doing the following:
- Creates Hosted Zone
- Creates a hosted zone that has the same name as your domain.
- Assigns Name Servers
- Assigns a set of four name servers to the hosted
zone. When someone uses a browser to access your website, such as
www.example.com, these name servers tell the browser where to find your resources, such as a web server or an Amazon S3 bucket. - Adds Name Servers to Domain
- Gets the name servers from the hosted zone and adds them to the domain.
For more information, see How Internet Traffic Is Routed to Your Website or Web Application.
- At the end of the registration process, we send your information to the registrar for the domain. The domain registrar is either Amazon Registrar, Inc. or our registrar associate, Gandi. To find out who the registrar is for your domain, see Domains That You Can Register with Amazon Route 53.
- The registrar sends your information to the registry for the domain. A
registry is a company that sells domain registrations for one or more
top-level domains, such as
.com. - The registry stores the information about your domain in their own database and also stores some of the information in the public WHOIS database.
Route 53 Hosted Zones
When you register a domain with Route 53, we automatically create a hosted zone for the domain and charge a small monthly fee for the hosted zone in addition to the annual charge for the domain registration. This hosted zone is where you store information about how to route traffic for your domain, for example, to an Amazon EC2 instance or a CloudFront distribution. If you don’t want to use your domain right now, you can delete the hosted zone; if you delete it within 12 hours of registering the domain, there won’t be any charge for the hosted zone on your AWS bill. We also charge a small fee for the DNS queries that we receive for your domain.
A public hosted zone is a container that holds information about how you want
to route traffic on the internet for a specific domain, such as example.com,
and its subdomains (acme.example.com, zenith.example.com).
You get a public hosted zone in one of two ways:
- When you register a domain with Route 53, we create a hosted zone for you automatically.
- When you transfer DNS service for an existing domain to Route 53, you start by creating a hosted zone for the domain.
In both cases, you then create records in the hosted zone to specify how you want to route traffic for the domain and subdomains. You can also use a Route 53 private hosted zone to route traffic within one or more VPCs that you create with the Amazon VPC service.
- NS and SOA Records
When you create a hosted zone, Amazon Route 53 automatically creates a name server (NS) record and a start of authority (SOA) record for the zone. Don’t change these records.
- Name Server Record—NS
- Amazon Route 53 automatically creates a name server (NS) record that has the same name as your hosted zone. It lists the four name servers that are the authoritative name servers for your hosted zone. Do not add, change, or delete name servers in this record.
- The NS record identifies the four name servers that you give to your registrar or your DNS service so that DNS queries are routed to Route 53 name servers.
- To get the list of name servers for your hosted zone:
- Sign in to the AWS Management Console and open the Route 53 console
- In the navigation pane, click
Hosted Zones. - On the Hosted Zones page, choose the radio button (not the name) for the hosted zone.
- In the right pane, make note of the four servers listed for Name Servers.
Each Amazon Route 53 hosted zone is associated with four name servers, known collectively as a delegation set. By default, the name servers have names like
ns-2048.awsdns-64.com. If you want the domain name of your name servers to be the same as the domain name of your hosted zone, for example,ns1.example.com, you can configure white-label name servers, also known as vanity name servers or private name servers. See Configuring White-Label Name Servers. - Start of Authority Record—SOA
The start of authority (SOA) record identifies the base DNS information about the domain, for example:
ns-2048.awsdns-64.net. hostmaster.example.com. 1 7200 900 1209600 86400
A SOA record includes the following elements:
- The Route 53 name server that created the SOA record
- The email address of the administrator. The default value is an amazon.com email address that is not monitored.
- A serial number that you can optionally increment whenever you update a record in the hosted zone. Route 53 doesn’t increment the number automatically.
- A refresh time in seconds that secondary DNS servers wait before querying the primary DNS server’s SOA record to check for changes.
- The retry interval in seconds that a secondary server waits before retrying a failed zone transfer.
- The time in seconds that a secondary server will keep trying to complete a zone transfer. If this time elapses before a successful zone transfer, the secondary server will stop answering queries because it considers its data too old to be reliable.
- The minimum time to live (TTL).
- Name Server Record—NS
- Create a Public Hosted Zone
You can create a hosted zone only for a domain that you have permission to administer. Typically, this means that you own the domain, but you might also be developing an application for the domain registrant.
- Sign in to the AWS Management Console and open the Route 53 console
If you’re new to Route 53, choose
Get Started NowunderDNS Management. On the next page, chooseCreate Hosted Zone.If you’re already using Route 53, choose
Hosted zonesin the navigation pane.- Choose Create Hosted Zone.
- In the
Create Hosted Zonepane, enter the name of the domain that you want to route traffic for. You can also optionally enter a comment. - For
Type, accept the default value ofPublic Hosted Zone. - Choose
Create. - Create records that specify how you want to route traffic for the domain and subdomains.
- To use records in the new hosted zone to route traffic for your domain, see
the applicable topic:
- If you’re making Route 53 the DNS service for a domain that is registered with another domain registrar, see Making Amazon Route 53 the DNS Service for an Existing Domain.
- If the domain is registered with Route 53, see Adding or Changing Name Servers and Glue Records for a Domain.
- Getting the Name Servers for a Public Hosted Zone
If you’re currently using another DNS service and you want to migrate to Amazon Route 53, you begin by creating a hosted zone. Route 53 automatically assigns four name servers to your hosted zone.
To ensure that the Domain Name System routes queries for your domain to the Route 53 name servers, update your registrar’s or your DNS service’s NS records for the domain to replace the current name servers with the names of the four Route 53 name servers for your hosted zone. The method that you use to update the NS records depends on which registrar or DNS service you’re using.
For more information about migrating your DNS service to Route 53, see Using Amazon Route 53 as the DNS Service for Subdomains Without Migrating the Parent Domain.
Note: Some registrars only allow you to specify name servers using IP addresses; they don’t allow you to specify fully qualified domain names. If your registrar requires using IP addresses, you can get the IP addresses for your name servers using the
digutility (for Mac, Unix, or Linux) or thenslookuputility (for Windows).- Sign in to the AWS Management Console and open the Route 53 console
- In the navigation pane, click
Hosted Zones. - On the Hosted Zones page, choose the radio button (not the name) for the hosted zone.
- In the right pane, make note of the four servers listed for
Name Servers.
- Preventing Traffic from Being Routed to Your Domain
If you want to keep your domain registration but you want to stop routing internet traffic to your website or web application, we recommend that you delete records in the hosted zone instead of deleting the hosted zone. If you delete a hosted zone, you can’t undelete it. You must create a new hosted zone and update the name servers for your domain registration, which can require up to 48 hours to take effect. If you delete a hosted zone, someone could hijack the domain and route traffic to their own resources using your domain name.
If you want to avoid the monthly charge for the hosted zone, you can transfer DNS service for the domain to a free DNS service.3 When you transfer DNS service, you have to update the name servers for the domain registration.
- If the domain is registered with Route 53, see Adding or Changing Name Servers and Glue Records for a Domain for information about how to replace Route 53 name servers with name servers for the new DNS service.
- If the domain is registered with another registrar, use the method provided by the registrar to update name servers for the domain registration.
Procedure
When you want to register a new domain using the Amazon Route 53 console, perform the following procedure.
- Sign in to the AWS Management Console and open the Route 53 console.
- If you’re new to Route 53, under
Domain Registration, chooseGet Started Now. If you’re already using Route 53, in the navigation pane, chooseRegistered Domains. - Choose
Register Domain, and specify the domain that you want to register:- Enter the domain name that you want to register, and choose
Checkto find out whether the domain name is available. - If the domain is available, choose
Add to cart. The domain name appears in your shopping cart. - In the shopping cart, choose the number of years that you want to register the domain for.
- To register more domains, repeat steps 3a through 3c.
- Enter the domain name that you want to register, and choose
- Choose
Continue. - On the
Contact Details for Your n Domainspage, enter contact information for the domain registrant, administrator, and technical contacts. The values that you enter here are applied to all of the domains that you’re registering. - Choose
Continue. - Generic TLDs only — If you’re registering a domain that has a generic TLD,
such as
.com,.org, or.net, and you specified an email address for the registrant contact that has never been used to register a domain with Route 53, you need to verify that the address is valid. - Review the information that you entered, read the terms of service, and select the check box to confirm that you’ve read the terms of service.
- Choose
Complete Purchase. - Generic TLDs only — Verify that the email address for the registrant contact is valid.
- For all TLDs, you’ll receive an email when your domain registration has been approved.
- We configure the domain to automatically renew as the expiration date
approaches. If you want to change this setting, see
Enabling or Disabling
    Automatic Renewal for a Domain
. - When domain registration is complete, your next step depends on whether you
want to use Route 53 or another DNS service as the DNS service for the
domain:
- Route 53
In the hosted zone that Route 53 created when you registered the domain, create records to tell Route 53 how you want to route traffic for the domain and subdomains.
For example, when someone enters your domain name in a browser and that query is forwarded to Route 53, do you want Route 53 to respond to the query with the IP address of a web server in your data center or with the name of an ELB load balancer?
For more information, see Working with Records.
- Another DNS service
- Configure your new domain to route DNS queries to the other DNS service.
Working with Records
After you create a hosted zone for your domain, such as example.com, you
create records to tell the Domain Name System (DNS) how you want traffic to
be routed for that domain.
For example, you might create records that cause DNS to do the following:
- Route internet traffic for
example.comto the IP address of a host in your data center. - Route email for that domain (
ichiro@example.com) to a mail server (mail.example.com). - Route traffic for a subdomain called
operations.tokyo.example.com to the IP address of a different host.
Each record includes the name of a
- domain or a subdomain,
- a record type (for example, a record with a type of
MXroutes email), and - other information applicable to the record type (for
MXrecords, the host name of one or more mail servers and a priority for each server).
The name of each record in a hosted zone must end with the name of the hosted zone.
For example, the
example.comhosted zone can contain records forwww.example.comandaccounting.tokyo.example.comsubdomains, but cannot contain records for awww.example.casubdomain.
Amazon Route 53 doesn’t charge for the records that you add to a hosted zone.
When you create a record, you choose a routing policy, which determines how Amazon Route 53 responds to queries:
- Simple routing policy
Use for a single resource that performs a given function for your domain, for example, a web server that serves content for the example.com website.
Simple routing lets you configure standard DNS records, with no special Route 53 routing such as weighted or latency. With simple routing, you typically route traffic to a single resource, for example, to a web server for your website.
If you choose the simple routing policy in the Route 53 console, you can’t create multiple records that have the same name and type, but you can specify multiple values in the same record, such as multiple IP addresses. If you choose the simple routing policy for an alias record, you can specify only one AWS resource or one record in the current hosted zone.
- Values for Basic/Alias Records
- When you create basic/alias records, you
specify the following values. See Choosing Between Alias and Non-Alias
Records (or below).
- Name
- Enter the name of the domain or subdomain that you want to route
traffic for. The default value is the name of the hosted zone.
If you’re creating a record that has the same name as the hosted
zone, don’t enter a value. If you’re creating a record that has
a value of CNAME for Type, the name of the record can’t be the
same as the name of the hosted zone. You can use an asterisk
(
*) character in the name. DNS treats the*character either as a wildcard or as the*character (ASCII 42), depending on where it appears in the name.- Aliases to CloudFront distributions and Amazon S3 buckets
- The value that you specify depends in part on the AWS resource that
you’re routing traffic to:
- CloudFront distribution
Your distribution must include an alternate domain name that matches the name of the record. For example, if the name of the record is
acme.example.com, your CloudFront distribution must includeacme.example.comas one of the alternate domain names.For more information, see Using Alternate Domain Names (CNAMEs) in the Amazon CloudFront Developer Guide.
- Amazon S3 buckete
The name of the record must match the name of your Amazon S3 bucket. For example, if the name of your bucket is
acme.example.com, the name of this record must also beacme.example.com.In addition, you must configure the bucket for website hosting. For more information, see Configure a Bucket for Website Hosting in the Amazon Simple Storage Service Developer Guide.
- Type
The DNS record type. For more information, see Supported DNS Record Types. Select the value for Type based on how you want Route 53 to respond to DNS queries.
For an Alias, select the applicable value based on the AWS resource that you’re routing traffic to:
- API Gateway custom regional API or edge-optimized API
- Select
A — IPv4address. - Amazon VPC interface endpoints
- Select
A — IPv4address. - CloudFront distribution
Select
A — IPv4address.If IPv6 is enabled for the distribution, create two records, one with a value of
A — IPv4address forType, and one with a value ofAAAA — IPv6address.- Elastic Beanstalk environment that has regionalized subdomains
- Select
A — IPv4address - ELB load balancer
- Select
A — IPv4address orAAAA — IPv6address - Amazon S3 bucket
- Select
A — IPv4address - Another record in this hosted zone
Select the type of the record that you’re creating the alias for. All types are supported except
NSandSOA.Note:. If you’re creating an alias record that has the same name as the hosted zone (known as the zone apex), you can’t route traffic to a record for which the value of
TypeisCNAME. This is because the alias record must have the same type as the record you’re routing traffic to, and creating aCNAMErecord for the zone apex isn’t supported even for an alias record.
- Alias
- Select
NoorYesas appropriate. - Alias Target
- The value that you specify depends on the AWS resource
that you’re routing traffic to.
- API Gateway custom regional APIs and edge-optimized APIs
- (see documentation)
- CloudFront Distributions
- (see documentation)
- Elastic Beanstalk environments that have regionalized subdomains
- (see documentation)
- ELB Load Balancers
- (see documentation)
- Amazon S3 Buckets
For Amazon S3 buckets that are configured as website endpoints, do one of the following:
- If you used the same account to create your Route 53 hosted zone and your Amazon S3 bucket—Choose Alias Target and choose a bucket from the list. If you have a lot of buckets, you can enter the first few characters of the DNS name to filter the list. The value of Alias Target changes to the Amazon S3 website endpoint for your bucket.
- If you used different accounts to create your Route 53 hosted zone and your Amazon S3 bucket—Enter the name of the region that you created your S3 bucket in. Use the value that appears in the Website Endpoint column in the Amazon Simple Storage Service Website Endpoints table in the AWS Regions and Endpoints chapter of the Amazon Web Services General Reference. If you used AWS accounts other than the current account to create your Amazon S3 buckets, the bucket won’t appear in the Alias Targets list.
You must configure the bucket for website hosting. For more information, see Configure a Bucket for Website Hosting in the Amazon Simple Storage Service Developer Guide.
The name of the record must match the name of your Amazon S3 bucket. For example, if the name of your Amazon S3 bucket is
acme.example.com, the name of this record must also beacme.example.com- Amazon VPC interface endpoints
- (see documentation)
- Records in this Hosted Zone
- (see documentation)
- Alias Hosted Zone ID
- This value appears automatically based on the
value that you selected or entered for
Alias Target. - Routing Policy (Alias)
- Select
Simple. - Evaluate Target Health (Alias)
- When the value of
Routing PolicyisSimple, chooseNo. If you have only one record that has a given name and type, Route 53 responds to DNS queries using the values in that record regardless of whether the resource is healthy. - TTL (Time to Live)
- The amount of time, in seconds, that you want DNS recursive resolvers to cache information about this record. If you specify a longer value (for example, 172800 seconds, or two days), you pay less for Route 53 service because recursive resolvers send requests to Route 53 less often. However, it takes longer for changes to the record (for example, a new IP address) to take effect because recursive resolvers use the values in their cache for longer periods instead of asking Route 53 for the latest information.
- Value
- Enter a value that is appropriate for the value of
Type. For all types exceptCNAME, you can enter more than one value. Enter each value on a separate line.- A—IPv4 address
- An IP address in IPv4 format, for example,
192.0.2.235. - AAAA—IPv6 address
- An IP address in IPv6 format, for example,
2001:0db8:85a3:0:0:8a2e:0370:7334. - CAA—Certificate Authority Authorization
- Three space-separated values that control which certificate authorities are allowed to issue certificates or wildcard certificates for the domain or subdomain that is specified by Name.
- CNAME—Canonical name
- The fully qualified domain name (for example,
www.example.com) that you want Route 53 to return in response to DNS queries for this record. A trailing dot is optional; Route 53 assumes that the domain name is fully qualified. This means that Route 53 treatswww.example.com(without a trailing dot) andwww.example.com.(with a trailing dot) as identical. - MX—Mail exchange
- A priority and a domain name that specifies a
mail server, for example,
10 mailserver.example.com. - NAPTR—Name Authority Pointer
- Six space-separated settings that are used by Dynamic Delegation Discovery System (DDDS) applications to convert one value to another or to replace one value with another. For more information, see NAPTR Record Type.
- NS—Name server
- The domain name of a name server, for example,
ns1.example.com. - PTR—Pointer
- The domain name that you want Route 53 to return.
- SOA—Start of Authority
- Basic DNS information about the domain. For more information, see The Start of Authority (SOA) Record.
- SPF—Sender Policy Framework
- An SPF record enclosed in quotation
marks, for example,
"v=spf1 ip4:192.168.0.1/16-all". SPF records are not recommended. For more information, see Supported DNS Record Types. - SRV—Service locator
- An SRV record. For information about SRV record format, refer to the applicable documentation.
- TXT—Text
- A text record. Enclose text in quotation marks, forn
example,
"Sample Text Entry".
- Routing policy
- Select
Simple.
- Failover routing policy
- Use when you want to configure active-passive failover.
- Geolocation routing policy
- Use when you want to route traffic based on the location of your users.
- Geoproximity routing policy
- Use when you want to route traffic based on the location of your resources and, optionally, shift traffic from resources in one location to resources in another.
- Latency routing policy
- Use when you have resources in multiple AWS Regions and you want to route traffic to the region that provides the best latency.
- Multivalue answer routing policy
- Use when you want Route 53 to respond to DNS queries with up to eight healthy records selected at random.
- Weighted routing policy
- Use to route traffic to multiple resources in proportions that you specify.
Amazon Route 53 alias records provide a Route 53–specific extension to DNS functionality.
Alias records let you route traffic to selected AWS resources, such as CloudFront distributions and Amazon S3 buckets. They also let you route traffic from one record in a hosted zone to another record.
Unlike a CNAME record, you can create an alias record at the top node of a
DNS namespace, also known as the zone apex. For example, if you register the
DNS name example.com, the zone apex is example.com. You can’t create a
CNAME record for example.com, but you can create an alias record for
example.com that routes traffic to www.example.com.
When Route 53 receives a DNS query for an alias record, Route 53 responds with the applicable value for that resource:
- An Amazon API Gateway custom regional API or edge-optimized API
- An Amazon VPC interface endpoint—Route 53 responds with one or more IP addresses for your interface endpoint.
- A CloudFront distribution
- An Elastic Beanstalk environment
- An ELB load balancer
- An Amazon S3 bucket that is configured as a static website—Route 53 responds with one IP address for the Amazon S3 bucket.
- Another Route 53 record in the same hosted zone
Alias records are similar to CNAME records, but there are some important differences:
- A CNAME record can redirect DNS queries to any DNS record. For example, you
can create a CNAME record that redirects queries from
acme.example.comtozenith.example.comor toacme.example.org. You don’t need to use Route 53 as the DNS service for the domain that you’re redirecting queries to. An alias record can only redirect queries to selected AWS resources, such as the following:
- Amazon S3 buckets
- CloudFront distributions
- Another record in the Route 53 hosted zone that you’re creating the alias record in
For example, you can create an alias record named
acme.example.comthat redirects queries to an Amazon S3 bucket that is also namedacme.example.com. You can also create anacme.example.comalias record that redirects queries to a record namedzenith.example.comin theexample.comhosted zone.- You can’t create a
CNAMErecord that has the same name as the hosted zone (the zone apex). This is true both for hosted zones for domain names (example.com) and for hosted zones for subdomains (zenith.example.com). - In most configurations, you can create an alias record that has the same name
as the hosted zone (the zone apex). The one exception is when you want to
redirect queries from the zone apex (such as
example.com) to a record in the same hosted zone that has a type ofCNAME(such aszenith.example.com). The alias record must have the same type as the record you’re routing traffic to, and creating aCNAMErecord for the zone apex isn’t supported even for an alias record. - Route 53 charges for CNAME queries.
- Route 53 doesn’t charge for alias queries to AWS resources. For more information, see Amazon Route 53 Pricing.
- A CNAME record redirects DNS queries for a record name regardless of record
type, such as
AorAAAA. - Route 53 responds to a DNS query only when the name of the alias record (such
as
acme.example.com) and the type of the alias record (such asAorAAAA) match the name and type in the DNS query. - A
CNAMErecord appears as aCNAMErecord in response todigornslookupqueries. - An alias record appears as the record type that you specified when you
created the record, such as
AorAAAA. Thealiasproperty is visible only in the Route 53 console or in the response to a programmatic request, such as an AWS CLIlist-resource-record-setscommand.
Amazon Route 53 supports the DNS record types that are listed in this section. Each record type also includes an example of how to format the Value element when you are accessing Route 53 using the API.
- A Record Type
- The value for an A record is an IPv4 address in dotted decimal notation.
- AAAA Record Type
- The value for a AAAA record is an IPv6 address in colon-separated hexadecimal format.
- CAA Record Type
- A CAA record lets you specify which certificate authorities (CAs) are allowed to issue certificates for a domain or subdomain.
- CNAME Record Type
- A CNAME Value element is the same format as a domain name. The DNS protocol does not allow you to create a CNAME record for the top node of a DNS namespace, also known as the zone apex. Amazon Route 53 also supports alias records, which allow you to route queries to AWS resources such as CloudFront distributions and Amazon S3 buckets. Aliases are similar in some ways to the CNAME record type; however, you can create an alias for the zone apex.
- MX Record Type
- Each value for an MX record actually contains two values, priority and domain name
- NAPTR Record Type
- A Name Authority Pointer (NAPTR) is a type of record that is used by Dynamic Delegation Discovery System (DDDS) applications to convert one value to another or to replace one value with another.
- NS Record Type
- An NS record identifies the name servers for the hosted zone.
- PTR Record Type
- A PTR record Value element is the same format as a domain name.
- SOA Record Type
- A start of authority (SOA) record provides information about a domain and the corresponding Amazon Route 53 hosted zone.
- SPF Record Type
- SPF records were formerly used to verify the identity of the sender of email messages.
- SRV Record Type
- An SRV record Value element consists of four space-separated values.
- TXT Record Type
- A TXT record contains one or more strings that are
enclosed in double quotation marks (
").
The following procedure explains how to create records using the Amazon Route 53 console.
If you’re not creating an alias record, go to step 2. Also go to step 2 if you’re creating an alias record that routes DNS traffic to an AWS resource other than an Elastic Load Balancing load balancer or another Route 53 record.
If you’re creating an alias record that routes traffic to an ELB load balancer, and if you created your hosted zone and your load balancer using different accounts, perform the procedure Getting the DNS Name for an ELB Load Balancer to get the DNS name for the load balancer.
- Sign in to the AWS Management Console and open the Route 53 console
- choose
Hosted zones - If you already have a hosted zone for your domain, skip to step 5. If you
don’t, perform the applicable procedure to create a hosted zone:
- To route internet traffic to your resources, such as Amazon S3 buckets or Amazon EC2 instances, see Creating a Public Hosted Zone.
- To route traffic in your VPC, see Creating a Private Hosted Zone.
- On the Hosted Zones page, choose the name of the hosted zone that you want to create records in.
- Choose
Create Record Set. - Enter the applicable values. For more information, see the topic for the kind of record that you want to create:
- Choose
Create.4 - If you’re creating multiple records, repeat steps 6 through 8.
Configure Route 53 as a DNS Service—Route Traffic to your Domain Name
https://docs.aws.amazon.com/Route53/latest/DeveloperGuide/dns-configuring.html
You can use Amazon Route 53 as the DNS service for your domain, such as
example.com. You can also use another DNS service to route traffice to
domain names registered with Route 53.
When Route 53 is your DNS service, it routes internet traffic to your website
by translating friendly domain names like www.example.com into numeric IP
addresses, like 192.0.2.1, that computers use to connect to each other.
When someone types your domain name in a browser or sends you an email, a DNS
query is forwarded to Route 53, which responds with the appropriate value.
For example, Route 53 might respond with the IP address for the web server for
example.com.
This section explains how to configure Route 53 to route your internet traffic to the right place, how to migrate DNS service to Route 53 if you’re currently using another DNS service, and how to use Route 53 as the DNS service for a new domain.
Overview of How to Configure Route 53 to Route Internet Traffic
- You register the domain name that you want your users to use to access your content.
- Route 53 automatically creates a public hosted zone that has the same name as the domain.
- You create records, also known as resource record sets, in your hosted
zone. Each record includes information about how you want to route traffic
for your domain:
- Name
- The name of the record corresponds with the domain name
(
example.com) or subdomain name (www.example.com,retail.example.com) that you want Route 53 to route traffic for. The name of every record in a hosted zone must end with the name of the hosted zone. - Type
- The record type usually determines the type of resource that you
want traffic to be routed to. For example, to route traffic to an
email server, you specify
MXfor Type. To route traffic to a web server that has an IPv4 IP address, you specifyAfor Type. - Value
- Value is closely related to Type. If you specify
MXfor Type, you specify the names of one or more email servers for Value. If you specifyAfor Type, you specify an IP address in IPv4 format, such as192.0.2.136.
For more information about routing internet traffic to your resources, see:
You can also create special Route 53 records, called alias records, that route traffic to
- Amazon S3 buckets,
- Amazon CloudFront distributions, and
- other AWS resources.
For more information, see:
Configure DNS Routing for a New Domain
When you register a domain with Route 53, we automatically make Route 53 the DNS service for the domain.
Route 53:
- creates a hosted zone that has the same name as the domain,
- assigns four name servers to the hosted zone, and
- updates the domain to use those name servers.
To specify how you want Route 53 to route internet traffic for the domain, you create records in the hosted zone.
For example, if you want to route requests for example.com to a web server that’s running on an Amazon EC2 instance, you create a record in the example.com hosted zone, and you specify the Elastic IP address for the EC2 instance.
Configure DNS Routing for an Existing Domain
If you’re transferring one or more domain registrations to Route 53, and you’re currently using a domain registrar that doesn’t provide paid DNS service, you need to migrate DNS service before you migrate the domain.
The process depends on whether you’re currently using the domain. For both options, your domain should remain available during the entire migration process. However, in the unlikely event that there are issues, the first option lets you roll back the migration quickly. With the second option, your domain could be unavailable for a couple of days.
If you want to migrate DNS service to Amazon Route 53 for a domain that is currently getting traffic—for example, if your users are using the domain name to browse to a website or access a web application—perform the procedures in this section.
- Step 1—Get Your Current DNS Configuration from the Current DNS Service Provider
When you migrate DNS service from another provider to Route 53, you reproduce your current DNS configuration in Route 53.
In Route 53, you create a hosted zone that
- has the same name as your domain, and
you create records in the hosted zone. Each record indicates how you want to route traffic for a specified domain name or subdomain name.
For example, when someone enters your domain name in a web browser, do you want traffic to be routed to a web server in your data center, to an Amazon EC2 instance, to a CloudFront distribution, or to some other location?
The process that you use depends on the complexity of your current DNS configuration:
- If your current DNS configuration is simple
- If you’re routing internet traffic for just a few subdomains to a small number of resources, such as web servers or Amazon S3 buckets, then you can manually create a few records in the Route 53 console.
- If your current DNS configuration is more complex, and you just want to reproduce your current configuration
You can simplify the migration if you can get a zone file from the current DNS service provider, and import the zone file into Route 53. (Not all DNS service providers offer zone files.) When you import a zone file, Route 53 automatically reproduces the existing configuration by creating the corresponding records in your hosted zone.
Try asking customer support with your current DNS service provider how to get a zone file or a records list.5
- If your current DNS configuration is more complex, and you’re interested in Route 53 routing features
- Review the following documentation to see whether you want to use Route 53
features that aren’t available from other DNS service providers. If so,
you can either create records manually, or you can import a zone file and
then create or update records later:
- Choosing Between Alias and Non-Alias Records explains the advantages of Route 53 alias records, which route traffic to some AWS resources, such as CloudFront distributions and Amazon S3 buckets, for no charge.
- Choosing a Routing Policy explains the Route 53 routing options, for example, routing based on the location of your users, routing based on the latency between your users and your resources, routing based on whether your resources are healthy, and routing to resources based on weights that you specify.
- You can also import a zone file and later change your configuration to take advantage of alias records and complex routing policies.
If you can’t get a zone file or if you want to manually create records in Route 53, the records that you’re likely to migrate include the following:
- A (Address) records
- associate a domain name or subdomain name with the IPv4 address (for example, 192.0.2.3) of the corresponding resource
- AAAA (Address) records
- associate a domain name or subdomain name with the IPv6 address (for example, 2001:0db8:85a3:0000:0000:abcd:0001:2345) of the corresponding resource
- Mail server (MX) records
- route traffic to mail servers
- CNAME records
- reroute traffic for one domain name
(example.net) to another domain name (example.com) - Records for other supported DNS record types
- For a list of supported record types, see Supported DNS Record Types.
- Step 2—Create a Hosted Zone
To tell Amazon Route 53 how you want to route traffic for your domain, you
- create a hosted zone that has the same name as your domain6, and then
- you create records in the hosted zone.
When you create a hosted zone, Route 53 automatically creates
- a name server (NS) record; the NS record identifies the four name servers that Route 53 associated with your hosted zone; and
- a start of authority (SOA) record for the zone.
To make Route 53 the DNS service for your domain, you update the registration for the domain to use these four name servers. Don’t create additional name server (NS) or start of authority (SOA) records, and don’t delete the existing NS and SOA records.
- Sign in to the AWS Management Console and open the Route 53 console
- If you’re new to Route 53, choose
Get Started NowunderDNS Management. If you’re already using Route 53, chooseHosted Zonesin the navigation pane. - Choose
Create Hosted Zone. - In the
Create Hosted Zonepane, enter a domain name and, optionally, a comment. For more information about a setting, pause the mouse pointer over its label to see a tool tip. - For
Type, accept the default value ofPublic Hosted Zone. - Choose
Create.
- Step 3—Create Records
After you create a hosted zone, you create records in the hosted zone that define where you want to route traffic for a domain (
example.com) or subdomain (www.example.com). For example, if you want to route traffic forexample.comandwww.example.comto a web server on an Amazon EC2 instance, you create two records, one namedexample.comand the other namedwww.example.com. In each record, you specify the IP address for your EC2 instance.You can create records in a variety of ways:
- Import a zone file
- This is the easiest method if you got a zone file from your current DNS service from Step 1. Amazon Route 53 can’t predict when to create alias records or to use special routing types such as weighted or failover. As a result, if you import a zone file, Route 53 creates standard DNS records using the simple routing policy.
- Create records individually in the console
- If you didn’t get a zone file and you just want to create a few records
with a routing policy of
Simpleto get started, you can create the records in the Route 53 console. You can create both alias and non-alias records. - Create records programmatically
You can create records by using one of the AWS SDKs, the AWS CLI, or AWS Tools for Windows PowerShell.
If you’re using a programming language that AWS doesn’t provide an SDK for, you can also use the Route 53 API.
- Step 4—Lower TTL Settings
The TTL (time to live) setting for a record specifies how long you want DNS resolvers to cache the record and used the cached information. When the TTL expires, a resolver sends another query to the DNS service provider for a domain to get the latest information.
The typical TTL setting for the NS record is 172800 seconds, or two days. The NS record lists the name servers that the Domain Name System (DNS) can use to get information about how to route traffic for your domain. Lowering the TTL for the NS record, both with your current DNS service provider and with Amazon Route 53, reduces downtime for your domain if you discover a problem while you’re migrating DNS to Route 53. If you don’t lower the TTL, your domain could be unavailable on the internet for up to two days if something goes wrong.
We recommend that you change the TTL on the following NS records:
- On the NS record in the hosted zone for the current DNS service provider. Use the method provided by the current DNS service provider for the domain to change the TTL for the NS record in the hosted zone for your domain.
- On the NS record in the hosted zone that you created in Step 2: Create a
Hosted Zone.
- Open the Route 53 console
- Choose
Hosted Zones - Choose the name of the hosted zone
- Choose the NS record
- Change the value of TTL (Seconds). We recommend that you specify a value between 60 seconds and 900 seconds (15 minutes).
- Choose
Save Record Set
- Step 5—Wait for the Old TTL to Expire
If your domain is in use—for example, if your users are using the domain name to browse to a website or access a web application—then DNS resolvers have cached the names of the name servers that were provided by your current DNS service provider. A DNS resolver that cached that information a few minutes ago will save it for almost two more days.
To ensure that migrating DNS service to Route 53 happens all at one time, wait for two days after you lowered the TTL. After the two-day TTL expires and resolvers request the name servers for your domain, the resolvers will get the current name servers and will also get the new TTL that you specified in Step 4: Lower TTL Settings.
- Step 6—Update the NS Record with Your Current DNS Service Provider to Use Route 53 Name Servers
To begin using Amazon Route 53 as the DNS service for a domain, update the NS record with the current DNS service provider for the domain.
When you update the NS record to use Route 53 name servers, you’re updating the DNS configuration for the domain. (This is comparable to updating the NS record in the Route 53 hosted zone for a domain except that you’re updating the setting with the DNS service that you’re migrating away from).
In Step 8: Update the Domain Registration to Use Amazon Route 53 Name Servers, you update the domain registration to use the same four name servers. The domain can be registered with Route 53 or with another domain registrar.
- In the Route 53 console, get the name servers for your hosted zone:
- open the Route 53 console
- In the navigation pane, choose
Hosted zones - On the
Hosted zonespage, choose the radio button (not the name) for the applicable hosted zone - Make note of the four names listed for
Name Servers
- Use the method that is provided by the current DNS service for the domain to
update the NS record for the hosted zone. The process depends on whether the
current DNS service lets you delete name servers:
- If you can delete name servers:
- Make note of the names of the current name servers in the NS record for the hosted zone. If you need to revert to the current DNS configuration, these are the servers that you’ll specify.
- Delete the current name servers from the NS record.
- Update the NS record with the names of all four of the Route 53 name servers that you got in step 1 of this procedure.
- When you’re finished, the only name servers in the NS record will be the four Route 53 name servers.
- If you cannot delete name servers:
- Choose the option to use custom name servers.
- Add all four Route 53 name servers that you got in step 1 of this procedure.
- If you can delete name servers:
- In the Route 53 console, get the name servers for your hosted zone:
- Step 7—Monitor Traffic for the Domain
Monitor traffic for the domain, including website or application traffic, and email:
- If the traffic slows or stops
- Use the method provided by the previous DNS service to change the name servers for the domain back to the previous name servers. These are the name servers that you made note of in step 2 of To update the NS record with your current DNS service provider to use Route 53 name servers. Then determine what went wrong.
- If the traffic is unaffected
- Continue to Step 8
- Step 8—Update the Domain Registration to Use Amazon Route 53 Name Servers
When you’re confident that migrating DNS service to Route 53 was successful, you can change the DNS service for your domain to Amazon Route 53. Perform the following procedure to update settings with the domain registrar.
- To update the name servers for the domain
- In the Route 53 console, get the name servers for your Route 53 hosted
zone
- Open the Route 53 console
- In the navigation pane, choose
Hosted zones - On the
Hosted zonespage, choose the radio button (not the name) for the applicable hosted zone - Make note of the four names listed for
Name Servers
- Use the method provided by the registrar for the domain to change the name
servers for the domain to use the four Route 53 name servers that you got
in step 1 of this procedure.
- If the domain is registered with Route 53, see Adding or Changing Name Servers and Glue Records for a Domain.
- In the Route 53 console, get the name servers for your Route 53 hosted
zone
- Step 9—Change the TTL for the NS Record Back to a Higher Value
In the Amazon Route 53 hosted zone for the domain, change the TTL for the NS record to a more typical value, for example, 172800 seconds (two days). This improves latency for your users because they don’t have to wait as often for DNS resolvers to send a query for the name servers for your domain.
- open the Route 53
- Choose
Hosted Zones - Choose the name of the hosted zone
- In the list of records for the hosted zone, choose the NS record
- Change
TTL (Seconds)to the number of seconds that you want DNS resolvers to cache the names of the name servers for your domain. We recommend a value of172800 seconds. - Choose
Save Record Set
- Step 10—Transfer Domain Registration to Amazon Route 53
Now that you’ve transferred DNS service for a domain to Amazon Route 53, you can optionally transfer registration for the domain to Route 53.
To migrate DNS service to Amazon Route 53 for a domain that isn’t getting any traffic (or is getting very little traffic):
- Step 1—Get Your Current DNS Configuration from the Current DNS Service Provider
When you migrate DNS service from another provider to Route 53, you reproduce your current DNS configuration in Route 53.
In Route 53, you create a hosted zone that has the same name as your domain, and you create records in the hosted zone. Each record indicates how you want to route traffic for a specified domain name or subdomain name.
For example, when someone enters your domain name in a web browser, do you want traffic to be routed to a web server in your data center, to an Amazon EC2 instance, to a CloudFront distribution, or to some other location?
The process that you use depends on the complexity of your current DNS configuration:
- If your current DNS configuration is simple
- If you’re routing internet traffic for just a few subdomains to a small number of resources, such as web servers or Amazon S3 buckets, then you can manually create a few records in the Route 53 console.
- If your current DNS configuration is more complex, and you just want to reproduce your current configuration
You can simplify the migration if you can get a zone file from the current DNS service provider, and import the zone file into Route 53. (Not all DNS service providers offer zone files.) When you import a zone file, Route 53 automatically reproduces the existing configuration by creating the corresponding records in your hosted zone.
Try asking customer support with your current DNS service provider how to get a zone file or a records list.5
- If your current DNS configuration is more complex, and you’re interested in Route 53 routing features
- Review the following documentation to see whether you want to use Route 53
features that aren’t available from other DNS service providers. If so,
you can either create records manually, or you can import a zone file and
then create or update records later:
- Choosing Between Alias and Non-Alias Records explains the advantages of Route 53 alias records, which route traffic to some AWS resources, such as CloudFront distributions and Amazon S3 buckets, for no charge.
- Choosing a Routing Policy explains the Route 53 routing options, for example, routing based on the location of your users, routing based on the latency between your users and your resources, routing based on whether your resources are healthy, and routing to resources based on weights that you specify.
- You can also import a zone file and later change your configuration to take advantage of alias records and complex routing policies.
If you can’t get a zone file or if you want to manually create records in Route 53, the records that you’re likely to migrate include the following:
- A (Address) records
- associate a domain name or subdomain name with the IPv4 address (for example, 192.0.2.3) of the corresponding resource
- AAAA (Address) records
- associate a domain name or subdomain name with the IPv6 address (for example, 2001:0db8:85a3:0000:0000:abcd:0001:2345) of the corresponding resource
- Mail server (MX) records
- route traffic to mail servers
- CNAME records
- reroute traffic for one domain name (example.net) to another domain name (example.com)
- Records for other supported DNS record types
- For a list of supported record types, see Supported DNS Record Types.
- Step 2—Create a Hosted Zone (Inactive Domains)
To tell Amazon Route 53 how you want to route traffic for your domain, you
- create a hosted zone that has the same name as your domain, and then
- create records in the hosted zone.6
When you create a hosted zone, Route 53 automatically creates a name server (NS) record and a start of authority (SOA) record for the zone. The NS record identifies the four name servers that Route 53 associated with your hosted zone. To make Route 53 the DNS service for your domain, you update the registration for the domain to use these four name servers. Don’t create additional name server (NS) or start of authority (SOA) records, and don’t delete the existing NS and SOA records.
- Sign in to the AWS Management Console and open the Route 53 console
- If you’re new to Route 53, choose
Get Started NowunderDNS Management. If you’re already using Route 53, chooseHosted Zonesin the navigation pane. - Choose
Create Hosted Zone - In the
Create Hosted Zonepane, enter a domain name and, optionally, a comment - For
Type, accept the default value ofPublic Hosted Zone - Choose
Create
- Step 3—Create Records (Inactive Domains)
After you create a hosted zone, you create records in the hosted zone that define where you want to route traffic for a domain (
example.com) or subdomain (www.example.com).For example, if you want to route traffic for
example.comandwww.example.comto a web server on an Amazon EC2 instance, you create two records, one namedexample.comand the other namedwww.example.com. In each record, you specify the IP address for your EC2 instance.You can create records in a variety of ways:
- Import a zone file
- This is the easiest method if you got a zone file from your current DNS service in Step 1: Get Your Current DNS Configuration from the Current DNS Service Provider (Inactive Domains). Amazon Route 53 can’t predict when to create alias records or to use special routing types such as weighted or failover. As a result, if you import a zone file, Route 53 creates standard DNS records using the simple routing policy.
- Create records individually in the console
- If you didn’t get a zone file and you just want to create a few records with a routing policy of Simple to get started, you can create the records in the Route 53 console. You can create both alias and non-alias records.
- Create records programmatically
- You can create records by using one of the AWS SDKs, the AWS CLI, or AWS Tools for Windows PowerShell. If you’re using a programming language that AWS doesn’t provide an SDK for, you can also use the Route 53 API.
- Step 4—Update the Domain Registration to Use Amazon Route 53 Name Servers (Inactive Domains)
When you’ve finished creating records for the domain, you can change the DNS service for your domain to Amazon Route 53. Perform the following procedure to update settings with the domain registrar.
- In the Route 53 console, get the name servers for your Route 53 hosted zone:
- Open the Route 53 console
- choose
Hosted zones - choose the radio button (not the name) for the applicable hosted zone
- Make note of the four names listed for
Name Servers
- Use the method provided by the registrar for the domain to change the name
servers for the domain to use the four Route 53 name servers that you got in
step 1 of this procedure.
- If the domain is registered with Route 53, see Adding or Changing Name Servers and Glue Records for a Domain.
- In the Route 53 console, get the name servers for your Route 53 hosted zone:
Update the name servers for your domain when you want to use another DNS service
- Use the process that is provided by your DNS service to get the name servers for the domain.
- Sign in to the AWS Management Console and open the Route 53 console
- Choose
Registered Domains - Choose the name of the domain that you want to configure to use another DNS service
- Choose
Add/Edit Name Servers - Change the names of the name servers to the name servers that you got from your DNS service in step 1.
- Choose
Update - Delete the hosted zone that Route 53 created automatically when you
registered your domain. This prevents you from being charged for a hosted
zone that you aren’t using.
- choose
Hosted Zones - Select the radio button for the hosted zone that has the same name as your domain.
- Choose
Delete Hosted Zone - Choose
Confirm
- choose
4.2.6 Amazon Simple Storage Service—S3
“Object storage built to store and retrieve any amount of data from anywhere”
Amazon Simple Storage Service (Amazon S3) is an object storage service that offers industry-leading scalability, data availability, security, and performance. This means customers of all sizes and industries can use it to store and protect any amount of data for a range of use cases, such as websites, mobile applications, backup and restore, archive, enterprise applications, IoT devices, and big data analytics. Amazon S3 provides easy-to-use management features so you can organize your data and configure finely-tuned access controls to meet your specific business, organizational, and compliance requirements. Amazon S3 is designed for 99.999999999% (11 9’s) of durability, and stores data for millions of applications for companies all around the world.
Amazon Simple Storage Service (S3) is storage for the Internet. It is designed to make web-scale computing easier for developers.
Amazon S3 has a simple web services interface that you can use to store and retrieve any amount of data, at any time, from anywhere on the web.
It gives any developer access to the same highly scalable, reliable, fast, inexpensive data storage infrastructure that Amazon uses to run its own global network of web sites.
S3 Basics
Sign Up for S3
You will not be charged for Amazon S3 until you use it.
- Go to https://aws.amazon.com/s3/ and choose Get started with Amazon S3.
- Follow the on-screen instructions.
AWS will notify you by email when your account is active and available for you to use.
Create a Bucket
Every object in Amazon S3 is stored in a bucket. Before you can store data in Amazon S3, you must create a bucket. You are not charged for creating a bucket; you are charged only for storing objects in the bucket and for transferring objects in and out of the bucket.
- Sign in to the AWS Management Console and open the Amazon S3 console at https://console.aws.amazon.com/s3/.
- Choose
Create bucket. - In the
Bucket namefield, type a unique DNS-compliant name for your new bucket. Create your own bucket name using the follow naming guidelines:- The name must be unique across all existing bucket names in Amazon S3.
- After you create the bucket you cannot change the name, so choose wisely.
- Choose a bucket name that reflects the objects in the bucket because the bucket name is visible in the URL that points to the objects that you’re going to put in your bucket.
- For
Region, choose US West (Oregon) as the region where you want the bucket to reside. - Choose
Create.
Add an Object to a Bucket
An object can be any kind of file: a text file, a photo, a video, and so on.
- In the
Bucket namelist, choose the name of the bucket that you want to upload your object to. - Choose
UploadorGet started. - In the
Uploaddialog box, chooseAdd filesto choose the file to upload. - Choose a file to upload, and then choose
Open. - Choose
Upload.
View an Object
You can view information about your object and download the object to your local computer.
- In the
Bucket namelist, choose the name of the bucket that you created. - In the
Name list, select the check box next to the object that you uploaded, and then chooseDownloadon the object overview panel.
Move an Object
Now we create a folder and move the object into the folder by copying and pasting the object.
- In the
Bucket namelist, choose the name of the bucket that you created. - Choose
Create Folder, type favorite-pics for the folder name, chooseNonefor the encryption setting for the folder object and then chooseSave. - In the
Name list, select the check box next to the object that you want to copy, chooseMore, and then chooseCopy. - In the
Namelist, choose the name of the folder favorite-pics. - Choose
More, and then choosePaste. - Choose
Paste.
Delete an Object and Bucket
If you no longer need to store the object that you uploaded and made a copy of while going through this guide, you should delete the objects to prevent further charges.
You can delete the objects individually. Or you can empty a bucket, which deletes all the objects in the bucket without deleting the bucket.
You can also delete a bucket and all the objects contained in the bucket. However, if you want to continue to use the same bucket name, don’t delete the bucket. We recommend that you empty the bucket and keep it. After a bucket is deleted, the name becomes available to reuse, but the name might not be available for you to reuse for various reasons. For example, it might take some time before the name can be reused and some other account could create a bucket with that name before you do.
To delete an object from a bucket:
- In the
Bucket namelist, choose the name of the bucket that you want to delete an object from. - In the
Namelist, select the check box next to the object that you want to delete, chooseMore, and then chooseDelete. - In the
Delete objectsdialog box, verify that the name of the object you selected for deletion is listed, and then chooseDelete.
To empty a bucket:
- In the
Bucket namelist, choose the bucket icon next to the name of the bucket that you want to empty and then chooseEmpty bucket. - In the
Empty bucketdialog box, type the name of the bucket for confirmation and then chooseConfirm.
To delete a bucket:
- In the
Bucket namelist, choose the bucket icon next to the name of the bucket that you want to delete and then chooseDelete bucket. - In the
Delete bucketdialog box, type the name of the bucket for delete confirmation and then chooseConfirm.
4.3 CloudFront
“Amazon CloudFront speeds up distribution of your static and dynamic web
content, such as .html, .css, .php, image, and media files. When users
request your content, CloudFront delivers it through a worldwide network of
edge locations that provide low latency and high performance.”
Amazon CloudFront is a fast content delivery network (CDN) service that securely delivers data, videos, applications, and APIs to customers globally with low latency, high transfer speeds, all within a developer-friendly environment.
When a user requests content that you’re serving with CloudFront, the user is routed to the edge location that provides the lowest latency (time delay), so that content is delivered with the best possible performance.
- If the content is already in the edge location with the lowest latency, CloudFront delivers it immediately.
- If the content is not in that edge location, CloudFront retrieves it from an origin that you’ve defined—such as an Amazon S3 bucket, a MediaPackage channel, or an HTTP server (for example, a web server) that you have identified as the source for the definitive version of your content.
4.3.1 Accelerate Static Website Content Delivery
CloudFront can speed up the delivery of your static content (for example, images, style sheets, JavaScript, and so on) to viewers across the globe. By using CloudFront, you can take advantage of the AWS backbone network and CloudFront edge servers to give your viewers a fast, safe, and reliable experience when they visit your website.
A simple approach for storing and delivering static content is to use an Amazon S3 bucket. Using S3 together with CloudFront has a number of advantages, including the option to use Origin Access Identity (OAI) to easily restrict access to your S3 content.
4.3.2 Encrypt Specific Fields Throughout System Processing
When you configure HTTPS with CloudFront, you already have secure end-to-end connections to origin servers. When you add field-level encryption, you can protect specific data throughout system processing in addition to HTTPS security, so that only certain applications at your origin can see the data.
To set up field-level encryption, you add a public key to CloudFront, and then specify the set of fields that you want to be encrypted with the key.
4.3.3 CloudFront Pricing
Amazon CloudFront is designed so you don’t have to pay any up-front fees or commit to how much content you’ll have. As with the other AWS services, you pay as you go and pay only for what you use.
AWS Free Tier includes 50GB data transfer out, 2,000,000 HTTP and HTTPS Requests with Amazon CloudFront.
AWS provides two usage reports for CloudFront: a billing report and a report that summarizes usage activity.
- Charge for storage in an Amazon S3 bucket. You pay normal Amazon S3 storage charges to store objects in your bucket. The charges appear in the Amazon S3 portion of your AWS statement.
- Charge for serving objects from edge locations. You incur CloudFront charges when CloudFront responds to requests for your objects. The charges include data transfer for WebSocket data from server to client. The CloudFront charges appear in the CloudFront portion of your AWS statement as region -DataTransfer-Out-Bytes.
- Charge for submitting data to your origin. You incur CloudFront charges when users transfer data to your origin, which includes DELETE, OPTIONS, PATCH, POST, and PUT requests. The charges include data transfer for WebSocket data from client to server. The CloudFront charges appear in the CloudFront portion of your AWS statement as region -DataTransfer-Out-OBytes.
- You also incur a surcharge for HTTPS requests, and an additional surcharge for requests that also have field-level encryption enabled.
Price Classes
CloudFront has edge locations all over the world. Our cost for each edge location varies and, as a result, the price that we charge you varies depending on the edge location from which CloudFront serves your requests.
CloudFront edge locations are grouped into geographic regions, and we’ve grouped regions into price classes. The default price class includes all regions. Another price class includes most regions (the United States; Canada; Europe; Hong Kong, Philippines, South Korea, Taiwan, and Singapore; Japan; India; South Africa; and Middle East regions) but excludes the most expensive regions. A third price class includes only the least expensive regions (the United States, Canada, and Europe regions).
If you’re willing to accept higher latency for your viewers in some geographic regions in return for lower cost, you can choose a price class that doesn’t include all CloudFront regions. Although CloudFront will serve your objects only from the edge locations in that price class, it still serves content from the edge location that has the lowest latency among the edge locations in your selected price class.
You can choose a price class when you create or update a CloudFront distribution.
4.3.4 Getting Started with CloudFront
https://docs.aws.amazon.com/AmazonCloudFront/latest/DeveloperGuide/GettingStarted.html
The example in this topic gives you a quick overview of how to use CloudFront to set up a basic configuration that:
- Stores the original versions of your objects in one Amazon Simple Storage Service (Amazon S3) bucket
- Distributes content such as text or graphics
- Makes your objects accessible to everyone
- Uses the CloudFront domain name in URLs for your objects (for example,
http://d111111abcdef8.cloudfront.net/image.jpg) - Keeps your objects in CloudFront edge locations for the default duration of 24 hours (the minimum duration is 0 seconds)
Most of these options are customizable. For information about how to customize your CloudFront distribution options, see:
You only have to complete a few basic steps to start delivering your content by using CloudFront. The first step is signing up. After that, you create a CloudFront distribution, and then use the CloudFront domain name in URLs in your web pages or applications to reference the content.
Upload your content to Amazon S3 and grant object permissions
By default, your Amazon S3 bucket and all of the files in it are private—only the AWS account that created the bucket has permission to read or write the files in it. If you want to allow anyone to access the files in your Amazon S3 bucket using CloudFront URLs, you must grant public read permissions to the objects. (This is one of the most common mistakes when working with CloudFront and Amazon S3. You must explicitly grant privileges to each object in an Amazon S3 bucket.)
On the
Set permissionspage, clear the following two checkboxes:- Block new public ACLs and uploading public objects
- Remove public access granted through public ACLs
You must allow public read access to the bucket and files so that CloudFront URLs can serve content from the bucket.
Upload files to the bucket. During the upload process:
On the
Set permissionspage, grant public read privileges for each file that you upload to your Amazon S3 bucket.- In the
Manage public permissionsdrop-down list, chooseGrant public read access to this object(s).
After the upload completes, you can navigate to the item by using its URL. In the case of the previous example, the URL would be:
http://s3-myregion.amazonaws.com/example-myawsbucket/filename
Use your Amazon S3 URL to verify that your content is publicly accessible, but remember that this is not the URL you’ll use when you’re ready to distribute your content with CloudFront.
- Create a CloudFront distribution
- Choose
Create Distribution. - In the Web section, choose
Get Started. - On the Create Distribution page, under Origin Settings, choose the Amazon
S3 bucket that you created earlier. Accept the default values for
- Origin ID,
- Origin Path,
- Restrict Bucket Access, and
- Origin Custom Headers.
- Under Default Cache Behavior Settings, accept the default values, and
CloudFront will:
- Forward all requests that use the CloudFront URL for your distribution
(for example,
 ) to the
Amazon S3 bucket that you specified in Step 4.
) to the
Amazon S3 bucket that you specified in Step 4. - Allow end users to use either HTTP or HTTPS to access your objects.
- Respond to requests for your objects.
- Cache your objects at CloudFront edge locations for 24 hours.
- Forward only the default request headers to your origin and not cache your objects based on the values in the headers.
- Exclude cookies and query string parameters, if any, when forwarding requests for objects to your origin. (Amazon S3 doesn’t process cookies and processes only a limited set of query string parameters.)
- Not be configured to distribute media files in the Microsoft Smooth Streaming format.
- Allow everyone to view your content.
- Not automatically compress your content.
- Forward all requests that use the CloudFront URL for your distribution
(for example,
- Under Distribution Settings, choose the values for your distribution:
- Price Class
- AWS WAF Web ACL
- Alternate Domain Names (CNAMEs)
- SSL Certificate
- Default Root Object
- Logging
- Cookie Logging
- Comment
- Distribution State
- Choose
Create Distribution. - After CloudFront has created your distribution, the value of the
Statuscolumn for your distribution will change fromInProgresstoDeployed. If you chose to enable the distribution, it will then be ready to process requests. This typically takes between 20 and 40 minutes.
- Choose
Test your links
After you’ve created your distribution, CloudFront knows where your Amazon S3 origin server is, and you know the domain name associated with the distribution. You can create a link to your Amazon S3 bucket content with that domain name, and have CloudFront serve it.
Copy the following HTML into a new file:
- Replace <domain name> with the domain name that CloudFront assigned to your distribution.
- Replace <object name> with the name of a file in your Amazon S3 bucket.
<html>
  <head>My CloudFront Test</head>
  <body>
    <p>My text content goes here.</p>
    <p><img src="http://domain name/object name" alt="my test image"/>
  </body>
</html>
For example, if your domain name was
d111111abcdef8.cloudfront.netand your object wasimage.jpg, the URL for the link would be:http://d111111abcdef8.cloudfront.net/image.jpg
If your object is in a folder within your bucket, include the folder in the URL. For example, if image.jpg is located in an images folder, then the URL would be:
http://d111111abcdef8.cloudfront.net/images/image.jpg
- Save the text in a file that has a
.htmlfilename extension. Open your web page in a browser to ensure that you can see your content. If you cannot see the content, confirm that you have performed all of the steps correctly. You can also see the tips in Troubleshooting.
The browser returns your page with the embedded image file, served from the edge location that CloudFront determined was appropriate to serve the object.
4.3.5 Set up a CloudFront Distribution for Amazon S3
https://aws.amazon.com/cloudfront/getting-started/S3/
Amazon CloudFront works seamlessly with Amazon Simple Storage Service (S3) to accelerate the delivery of your web content and reduce the load on your origin servers. Learn how to set up a CloudFront distribution with your Amazon S3 origin.
- Go to the AWS Console
- Create an Amazon S3 bucket
- Create an Amazon CloudFront distribution
- Specify your distribution settings
- Configure your origin
- Configure Origin Access Identity
- Configure default cache behavior
- Configure your TTLs
- Configure additional features
- Test your CloudFront distribution
4.3.6 CloudFront and Security
- Why Security Matters
- Trust
- Compliance
- Privacy
- Key Aspects of Security
- Infrastructure
- How Amazon secures the facilities and servers
- Services
- The security options and features available to the customer
- Enforce AWS IAM policies
- Use MFA
- Amazon VPC
- Leverage S3 bucket policies
- EC2 security
- Application
- Things the developer does in the application
- How CloudFront can Help
- Best Practices for Secured Delivery on Amazon CloudFront
4.4 Static Web Sites on AWS using S3
4.4.1 Creating a Static Website Using an Amazon S3 Bucket
This Getting Started tutorial shows you how to perform the following tasks:
- Register a domain name, such as example.com7
- Create an Amazon S3 bucket and configure it to host a website
- Create a sample website and save the file in your S3 bucket
- Configure Amazon Route 53 to route traffic to your new website
- To transfer an existing domain to Route 53, see Transferring Registration for a Domain to Amazon Route 53
When you’re finished, you’ll be able to open a browser, enter the name of your domain, and view your website.
Notes:
- When you register a domain, we automatically create a hosted zone that has the same name as the domain. You use the hosted zone to specify where you want Route 53 to route traffic for your domain. The fee for a hosted zone is $0.50 per month. You can delete the hosted zone if you want to avoid this charge.
- If you’re an existing AWS customer, charges are based on how much data you store, on the number of requests for your data, and on the amount of data transferred. For more information, see Amazon S3 Pricing.
- Before you begin, be sure that you’ve completed the steps in Setting Up Amazon Route 53.
Step 1—Register a Domain
Step 2—Create an S3 Bucket and Configure It to Host a Website
You can use S3 to host a static website in a bucket.
- Open the Amazon S3 console
- Choose

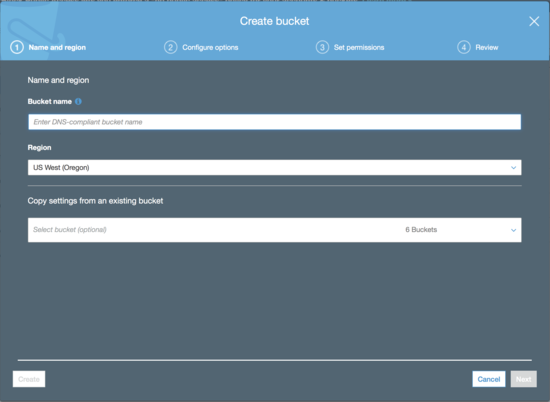
- For
Bucket Name, enter the name of your domain, such asexample.com. - For
Region, choose the region closest to most of your users. - Choose
Create .
. - In the right pane, expand
Permissions.

- Choose
Bucket Policybutton .
. Copy the following bucket policy and paste it into a text editor.
This policy grants everyone on the internet (
"Principal":"*") permission to get the files ("Action":["s3:GetObject"]) in the S3 bucket that is associated with your domain name ("arn:aws:s3:::your-domain-name/*"):{ "Version":"2012-10-17", "Statement":[{ "Sid":"AddPerm", "Effect":"Allow", "Principal":"*", "Action":[ "s3:GetObject" ], "Resource":[ "arn:aws:s3:::your-domain-name/*" (update-domain-name) ] }] }- In the bucket policy, replace the value
your-domain-namewith the name of your domain, such asexample.com. - Choose
Save.

- In the right pane, expand
Static website hosting. - Choose
Enable website hosting. - For Index document, enter
index.html. - Choose
Save.
Step 3—(Optional) Create Another S3 Bucket, for www.your-domain-name
In the preceding procedure, you created a bucket for your domain name, such as
example.com. This allows your users to access your website by using your domain
name, such as example.com.
If you also want your users to be able to use www.your-domain-name, such as
www.example.com, to access your sample website, you create a second S3
bucket. You then configure the second bucket to route traffic to the first
bucket.
To create an S3 bucket for www.your-domain-name:
- Choose
Create bucket. - For
Bucket Name, enterwww.your-domain-name. For example, if you registered the domain nameexample.com, enterwww.example.com. - For Region, choose the same region that you created the first bucket in.
- Choose
Create. - In the right pane, expand Static website hosting.
- Choose
Redirect all requests to another host name. - For
Redirect all requests to, enter your domain name. - Choose
Save.
Step 4—Create a Website and Upload It to Your S3 Bucket
Now that you have an S3 bucket to save your website in, you can create the first page for your website and upload it to (save it in) your bucket.
Copy the following text and paste it into a text editor:
<html>
<head>
  <title>Amazon Route 53 Getting Started</title>
</head>

<body>

  <h1>Routing Internet Traffic to an Amazon S3 Bucket for Your Website</h1>

  <p>For more information, see
    <a href="https://docs.aws.amazon.com/Route53/latest/DeveloperGuide/getting-started.html">
      Getting Started with Amazon Route 53
    </a>
    in the <emphasis>Amazon Route 53 Developer Guide</emphasis>.
  </p>

</body>

</html>
2 .Save the file with the file name index.html.
- In the Amazon S3 console, choose the name of the bucket that you created in the procedure above.
- Choose
Upload. - Choose
Add files. - Follow the on-screen prompts to select
index.html, and then chooseStart Upload.
Step 5—Route DNS Traffic for Your Domain to Your Website Bucket
You now have a one-page website in your S3 bucket. To start routing internet traffic for your domain to your S3 bucket, perform the following procedure.
- Open the Route 53 console
- In the navigation pane, choose Hosted zones.
- In the list of hosted zones, choose the name of your domain.
- Choose
Create Record Set.8 - Specify the following values:
- Name
For the first record that you’ll create, accept the default value, which is the name of your hosted zone and your domain. This will route internet traffic to the bucket that has the same name as your domain.
If you created a second S3 bucket, for
www.your-domain-name, you’ll repeat this step to create a second record. For the second record, enterwww. This will route internet traffic to thewww.your-domain-namebucket.- Type
- Choose
A – IPv4 address. - Alias
- Choose
Yes. - Alias Target
Enter the name of the region that you created your S3 bucket in. Use the applicable value from the
Website
                     Endpoint
column in the Amazon Simple Storage Service Website Endpoints table in the AWS Regions and Endpoints chapter of the Amazon Web Services General Reference.You specify the same value for Alias Target for both records. Route 53 figures out which bucket to route traffic to based on the name of the record.
- Routing Policy
- Accept the default value of
Simple. - Evaluate Target Health
- Accept the default value of
No.
- Choose
Create. - If you created a second S3 bucket, for
www.your-domain-name, repeat steps 4 through 6 to create a record forwww.your-domain-name.
Step 6—Test Your Website
To verify that the website is working correctly, open a web browser and browse to the following URLs:
- http://your-domain-name
- Displays the index document in the
your-domain-namebucket - http://www.your-domain-name
- Redirects your request to the your-domain-name bucket
In some cases, you might need to clear the cache to see the expected behavior.
Step 7—(Optional) Use Amazon CloudFront to Speed Up Distribution of Your Content
4.4.2 Hosting a Static Website on Amazon S3
You can host a static website on Amazon Simple Storage Service (Amazon S3).
Static websites deliver HTML, JavaScript, images, video and other files to your website visitors, and contain no application code. They are best for sites with few authors and relatively infrequent content changes, typically personal and simple marketing websites. Static websites are very low cost, provide high-levels of reliability, require almost no IT administration, and scale to handle enterprise-level traffic with no additional work.
On a static website, individual webpages include static content. They might also contain client-side scripts.
By contrast, a dynamic website relies on server-side processing, including server-side scripts such as PHP, JSP, or ASP.NET. Amazon S3 does not support server-side scripting.
Overview
- Deploy a static website using Amazon S3
- Amazon S3 will provide the origin for your website as well as storage for your static content.
- Associate your domain name with your website
- Amazon Route 53 will tell the Domain Name System (DNS) where to find your website.
- Enable your website to load quickly
- Amazon CloudFront will create a content delivery network (CDN) that hosts your website content in close proximity to your users.
- You will need
- an AWS account to begin provisioning resources to host your website.
- a basic understanding of web technologies and an existing website that you can bring to host on AWS.
- Monthly Billing Estimate
The total cost of hosting your static website on AWS will vary depending on your usage. Typically, it will cost $1-3/month if you are outside the AWS Free Tier limits. If you qualify for AWS Free Tier and are within the limits, hosting your static website will cost around $0.50/month.
To see a breakdown of the services used and their associated costs, see Services Used and Costs.
- Additional Resources
- Whitepaper: Hosting Static Websites on AWS. In this whitepaper, we cover comprehensive architectural guidance for developing, deploying, and managing static websites on AWS and provide a recommended approach.
- Website Hosting Solutions on AWS. Learn more about how AWS provides cloud website hosting solutions to provide flexible, highly scalable, and low-cost ways to deliver websites and web applications.
- Getting Started Resource Center. Need more resources to get started with AWS? Visit the Getting Started Resource Center to find tutorials, projects and videos to get started with AWS.
- Simple Virtual Private Servers on Amazon Lightsail. Accelerate your websites with Lightsail. It provides everything you need to jumpstart your website on AWS—compute, storage, and networking—for a low, predictable price.
Description
To host a static website:
- configure an Amazon S3 bucket for website hosting;
- upload your website content to the bucket.
- associate a domain name for the bucket
It is intentional that everyone in the world will have read access to this bucket. That is, in order for your customers to access content at the website endpoint, you must make all your content publicly readable, e.g., this bucket must have public read access. To do so, you can use a bucket policy or an ACL on an object to grant the necessary permissions.
The website is then available at the AWS Region-specific website endpoint of the bucket. The website endpoint of the bucket has a form such as:
<bucket-name>.s3-website-<AWS-region>.amazonaws.com
<bucket-name>.s3-website.<AWS-region>.amazonaws.com
Which form is used for the endpoint depends on what Region the bucket is in.
For a list of AWS Region-specific website endpoints for Amazon S3, see Website Endpoints. For a bucket residing in the US West (Oregon) region, the website is available at the following endpoint:
http://example-bucket.s3-website-us-west-2.amazonaws.com/
- Note that Website endpoints are different from the endpoints where you send REST API requests. For more information about the differences between the endpoints, see Key Differences Between the Amazon Website and the REST API Endpoint. See also Making Requests Using the REST API.
Instead of accessing the website by using an Amazon S3 website endpoint, you
can use your own domain, such as example.com to serve your content. Amazon
S3, along with Amazon Route 53, supports hosting a website at the root domain.
If you have a registered domain, you can add a DNS CNAME entry to point to the
Amazon S3 website endpoint.
For example, if you have registered domain,
www.example-bucket.com, you could create a bucketwww.example-bucket.com, and add a DNSCNAMErecord that points towww.example-bucket.com.s3-website-<region>.amazonaws.com. All requests tohttp://www.example-bucket.comare routed towww.example-bucket.com.s3-website-<region>.amazonaws.com.
To configure a bucket for website hosting, you add website configuration to the bucket. Note that the Amazon S3 website endpoints do not support HTTPS. Amazon CloudFront is used to serve HTTPS requests for data from Amazon S3 buckets.
Configuring a Bucket for Website Hosting
You can host a static website in an Amazon Simple Storage Service (Amazon S3) bucket after some configuration.
The required configuration includes:
- enabling the bucket for website hosting
- adding index document support
- adding universal read access permission
Enabling Website Hosting
Follow these steps to enable website hosting for your Amazon S3 buckets using the Amazon S3 console:
- Sign in to the AWS Management Console and open the Amazon S3 console at https://console.aws.amazon.com/s3/.
- In the list, choose the bucket that you want to use for your hosted website.
- Choose the
Propertiestab. - Choose
Static website hosting, and then chooseUse this bucketto host a website. - You are prompted to provide the index document and any optional error documents and redirection rules that are needed.
Configuring Index Document Support
An index document is a webpage that Amazon S3 returns when a request is made to the root of a website or any subfolder.
For example, if a user enters
http://www.example.comin the browser, the user is not requesting any specific page. In that case, Amazon S3 serves up the index document, which is sometimes referred to as the default page.
When you configure your bucket as a website, provide the name of the index document. You then upload an object with this name and configure it to be publicly readable.
In Amazon S3, a bucket is a flat container of objects; it does not provide any hierarchical organization as the file system on your computer does. You can create a logical hierarchy by using object key names that imply a folder structure.
For example, consider a bucket with three objects and the following key names.
sample1.jpg
photos/2006/Jan/sample2.jpg
photos/2006/Feb/sample3.jpg
Although these are stored with no physical hierarchical organization, you can infer the following logical folder structure from the key names.
sample1.jpg object is at the root of the bucket.
sample2.jpg object is in the photos/2006/Jan subfolder.
sample3.jpg object is in the photos/2006/Feb subfolder.
The folder concept that Amazon S3 console supports is based on object key
names. To continue the previous example, the console displays the examplebucket
with a photos folder. You can upload objects to the bucket or to the photos
folder within the bucket. If you add the object sample.jpg to the bucket, the
key name is sample.jpg. If you upload the object to the photos folder, the
object key name is photos/sample.jpg.
If you create such a folder structure in your bucket, you must have an index document at each level. When a user specifies a URL that resembles a folder lookup, the presence or absence of a trailing slash determines the behavior of the website.
For example, the following URL, with a trailing slash, returns the
photos/index.html index document.
http://example-bucket.s3-website-region.amazonaws.com/photos/
However, if you exclude the trailing slash from the preceding URL, Amazon S3
first looks for an object photos in the bucket. If the photos object is not
found, then it searches for an index document, photos/index.html. If that
document is found, Amazon S3 returns a 302 Found message and points to the
photos/ key. For subsequent requests to photos/, Amazon S3 returns
photos/index.html. If the index document is not found, Amazon S3 returns an
error.
Setting Permissions Required for Website Access
When you configure a bucket as a website, you must make the objects that you want to serve publicly readable. To do this:
- write a bucket policy that grants everyone
s3:GetObjectpermission - if a user requests an object that doesn’t exist, Amazon S3 returns HTTP
response code
404 (Not Found) - if the object exists but you haven’t granted read permission on it, the
website endpoint returns HTTP response code
403 (Access Denied) - The user can use the response code to infer whether a specific object exists
- If you don’t want this behavior, you should not enable website support for your bucket
The following sample bucket policy grants everyone access to the objects in the specified folder.9
{
  "Version":"2012-10-17",
  "Statement":[{
	"Sid":"PublicReadGetObject",
        "Effect":"Allow",
	  "Principal": "*",
      "Action":["s3:GetObject"],
      "Resource":["arn:aws:s3:::example-bucket/*"
      ]
    }
  ]
}
You can grant public read permission to your objects by using either a bucket
policy or an object ACL. To make an object publicly readable using an ACL,
grant READ permission to the AllUsers group, as shown in the following
grant element. Add this grant element to the object ACL.10
<Grant>
  <Grantee xmlns:xsi="http://www.w3.org/2001/XMLSchema-instance"
          xsi:type="Group">
    <URI>http://acs.amazonaws.com/groups/global/AllUsers</URI>
  </Grantee>
  <Permission>READ</Permission>
</Grant>
Optional Bucket Configurations
Configuring Web Traffic Logging
If you want to track the number of visitors who access your website, enable logging for the root domain bucket. Enabling logging is optional.
- Open the Amazon S3 console
- Create a bucket for logging named
logs.example.comin the same AWS Region that theexample.comandwww.example.combuckets were created in. - Create two folders in the
logs.example.com bucket; one namedroot, and the other namedcdn. If you configure Amazon CloudFront to speed up your website, you will use thecdnfolder. - In the
Bucket namelist, choose your root domain bucket, chooseProperties, and then chooseServer access logging. - Choose
Enable logging. - For
Target bucket, choose the bucket that you created for the log files,logs.example.com. - For
Target prefix, typeroot/. This setting groups the log data files in the bucket in a folder named root so that they are easy to locate. - Choose
Save.
Custom Error Document Support
The following table lists the subset of HTTP response codes that Amazon S3 returns when an error occurs.
| HTTP Error Code | Description |
|---|---|
| 301 Moved Permanently | When a user sends a request directly to the Amazon S3 website endpoints |
| 302 Found | When Amazon S3 receives a request for a key x |
| 304 Not Modified | Amazon S3 users request headers |
| 400 Malformed Request | The website endpoint responds with a 400 Malformed Request when a user attempts to access a bucket through the incorrect regional endpoint. |
| 403 Forbidden | The website endpoint responds with a 403 Forbidden when a user request translates to an object that is not publicly readable. The object owner must make the object publicly readable using a bucket policy or an ACL. |
| 404 Not Found | The website endpoint responds with 404 Not Found for the following reasons: |
| 500 Service Error | The website endpoint responds with a 500 Service Error when an internal server error occurs. |
| 503 Service Unavailable | The website endpoint responds with a 503 Service Unavailable when Amazon S3 determines that you need to reduce your request rate. |
For each of these errors, Amazon S3 returns a predefined HTML message.
You can optionally provide a custom error document that contains a user-friendly error message and additional help. You provide this custom error document as part of adding website configuration to your bucket. Amazon S3 returns your custom error document for only the HTTP 4XX class of error codes.
When an error occurs, Amazon S3 returns an HTML error document. If you configured your website with a custom error document, Amazon S3 returns that error document. However, some browsers display their own error message when an error occurs, ignoring the error document that Amazon S3 returns. For example, when an HTTP 404 Not Found error occurs, Google Chrome might ignore the error document that Amazon S3 returns and display its own error.
Configuring a Webpage Redirect
If your Amazon S3 bucket is configured for website hosting, you can redirect requests for an object to another object in the same bucket or to an external URL.
Setting Up a Static Website Using a Custom Domain
Configure a bucket for website hosting, upload a sample index document, and
test the website using the Amazon S3 website endpoint for the bucket. You can
use your own domain, such as example.com, instead of the S3 bucket website
endpoint, and serve content from an Amazon S3 bucket configured as a website.
Create and Configure Buckets and Upload Data
To support requests from both the root domain such as example.com and
subdomain such as www.example.com, you create two buckets. One bucket
contains the content. You configure the other bucket to redirect requests.
Services Used
- Amazon Route 53
You use Route 53 to register domains and to define where you want to route internet traffic for your domain. We explain how to create Route 53 alias records that route traffic for your domain (example.com) and subdomain (www.example.com) to an Amazon S3 bucket that contains an HTML file.
If you don’t already have a registered domain name, such as
example.com, register one with Route 53. When you have a registered domain name, your next tasks are to create and configure Amazon S3 buckets for website hosting and to upload your website content.- Amazon S3
You use Amazon S3 to create buckets, upload a sample website page, configure permissions so that everyone can see the content, and then configure the buckets for website hosting.
To support requests from both the root domain such as
example.comand subdomain such aswww.example.com, you create two buckets. One bucket contains the content. You configure the other bucket to redirect requests.
Your website will support requests from both example.com and
www.example.com. You will host your content out of the root domain bucket
(example.com), and you will redirect requests for www.example.com to the
root domain bucket. You can store content in either bucket. For this example,
you host content in the example.com bucket. The content can be text files,
family photos, videos—–whatever you want.
- Sign in to the Amazon S3 console with your AWS account credentials
- open the Amazon S3 console.
create the following two buckets that match your domain name and subdomain:11
example.comwww.example.com
The bucket names must match the names of the website that you are hosting. Like domains, subdomains must have their own S3 buckets, and the buckets must share the exact names as the subdomains.
- Upload your website data to the
example.combucket.12
When you configure a bucket for website hosting, you can access the website
using the Amazon S3 assigned bucket website endpoint. In this step, you
configure both buckets for website hosting. First, you configure example.com
as a website and then you configure www.example.com to redirect all requests
to the example.com bucket.
- Sign in to the AWS Management Console and open the Amazon S3 console
- In the
Bucket namelist, choose the name of the bucket that you want to enable static website hosting for. - Choose
Properties. - Choose
Static website hosting. - Configure the
example.combucket for website hosting. In theIndex Documentbox, type the name that you gave your index page. - Choose
Save.
Now that you have configured your bucket for website hosting, configure the
www.example.com bucket to redirect all requests for www.example.com to
example.com.
- In the Amazon S3 console, in the
Bucketslist, choose your bucket (www.example.com, in this example). - Choose
Properties. - Choose
Static website hosting. - Choose
Redirect requests. In theTarget bucket or domainbox, typeexample.com. - Choose
Save.
Optionally, you can configure logging to track the number of visitors accessing your website. To do that, you enable logging for the root domain bucket.
To test the website, type the URL of the endpoint in your browser. Your
request is redirected, and the browser displays the index document for
example.com.
Add Alias Records for example.com and www.example.com
In this step, you create the alias records that you add to the hosted zone for
your domain maps example.com and www.example.com to the corresponding S3
buckets. Instead of using IP addresses, the alias records use the Amazon S3
website endpoints. Amazon Route 53 maintains a mapping between the alias
records and the IP addresses where the Amazon S3 buckets reside.
- Open the Route 53 console
- In the list of hosted zones, choose the name of your domain.
- Choose
Create Record Set.13 - Specify the following values:
- Name
For the first record that you’ll create, accept the default value, which is the name of your hosted zone and your domain. This will route internet traffic to the bucket that has the same name as your domain.
Repeat this step to create a second record for your subdomain. For the second record, type
www. This will route internet traffic to thewww.example.combucket.- Type
- Choose
A – IPv4 address. - Alias
Yes- Alias Target
- Type the name of your Amazon S3 bucket endpoint, for
example
example.com(s3-website-us-west-2). You specify the same value forAlias Targetfor both records. Route 53 figures out which bucket to route traffic to based on the name of the record. - Routing Policy
- Accept the default value of
Simple. - Evaluate Target Health
- Accept the default value of
No.
- Choose
Create. - For
www.example.com, repeat steps 4 through 6 to create a record.
Testing
To verify that the website is working correctly, in your browser, try the following URLs:
http://example.com- Displays the index document in the
example.combucket. http://www.example.com- Redirects your request to
example.com.
Introducing Amazon EC2—Elastic Compute Cloud
“Secure and resizable compute capacity in the cloud. Launch applications when needed without upfront commitments.”
Amazon Elastic Compute Cloud (Amazon EC2) provides scalable computing capacity in the Amazon Web Services (AWS) cloud. Using Amazon EC2 eliminates your need to invest in hardware up front, so you can develop and deploy applications faster. You can use Amazon EC2 to launch as many or as few virtual servers as you need, configure security and networking, and manage storage. Amazon EC2 enables you to scale up or down to handle changes in requirements or spikes in popularity, reducing your need to forecast traffic.
Just as Amazon Simple Storage Service (Amazon S3) enables storage in the cloud, Amazon EC2 enables “compute” in the cloud.
- Amazon EC2’s simple web service interface allows you to obtain and configure capacity with minimal friction. The “Elastic” nature of the service allows developers to instantly scale to meet spikes in traffic or demand.
- It provides you with complete control of your computing resources and lets you run on Amazon’s proven computing environment.
- Amazon EC2 reduces the time required to obtain and boot new server instances to minutes, allowing you to quickly scale capacity, both up and down, as your computing requirements change.
- Amazon EC2 changes the economics of computing by allowing you to pay only for capacity that you actually use.
Overview to Using EC2
Sign up for Amazon Web Services first. You must have an Amazon Web Services account to access this service; if you do not already have one, you will be prompted to create one when you begin the Amazon EC2 sign-up process
Then open the Amazon EC2 console. To sign up for Amazon EC2, click the “Sign up for This Web Service” button on the Amazon EC2 detail page. After signing up, please refer to the Amazon EC2 documentation, which includes our Getting Started Guide.
Once you have set up your account and selected or created your AMIs, you are
ready to boot your instance. You can start your AMI on any number of On-Demand
instances by using the RunInstances API call. You simply need to indicate
how many instances you wish to launch. If Amazon EC2 is able to fulfill your
request, RunInstances will return success, and we will start launching your
instances. You can check on the status of your instances using the
DescribeInstances API call. You can also programmatically terminate any
number of your instances using the TerminateInstances API call. If you
prefer, you can also perform all these actions from the AWS Management Console
or through the command line using our command line tools, which have been
implemented with this web service API.
EC2 Web Service Interface
Amazon EC2’s simple web service interface allows you to obtain and configure capacity with minimal friction. It provides you with complete control of your computing resources and lets you run on Amazon’s proven computing environment. Amazon EC2 reduces the time required to obtain and boot new server instances to minutes, allowing you to quickly scale capacity, both up and down, as your computing requirements change. Amazon EC2 changes the economics of computing by allowing you to pay only for capacity that you actually use. Amazon EC2 provides developers the tools to build failure resilient applications and isolate them from common failure scenarios.
EC2 Free Tier
AWS Free Tier includes 750 hours of Linux and Windows t2.micro instances each
month for one year. To stay within the Free Tier, use only EC2 Micro
instances.
Benefits of EC2
- Elasticity
- Amazon EC2 enables you to increase or decrease capacity within minutes, not hours or days. You can commission one, hundreds, or even thousands of server instances simultaneously.
- Control
- You have complete control of your instances including root access and the ability to interact with them as you would any machine. You can stop any instance while retaining the data on the boot partition, and then subsequently restart the same instance using web service APIs. Instances can be rebooted remotely using web service APIs, and you also have access to their console output.
- Flexibility
- You have the choice of multiple instance types, operating systems, and software packages. Amazon EC2 allows you to select a configuration of memory, CPU, instance storage, and the boot partition size that is optimal for your choice of operating system and application.
- Integration
- Amazon EC2 is integrated with most AWS services such as Amazon Simple Storage Service (Amazon S3), Amazon Relational Database Service (Amazon RDS), and Amazon Virtual Private Cloud (Amazon VPC) to provide a complete, secure solution for computing, query processing, and cloud storage across a wide range of applications.
- Reliability
- Amazon EC2 offers a highly reliable environment where replacement instances can be rapidly and predictably commissioned.
- Security
- Cloud security at AWS is the highest priority. As an AWS customer, you will benefit from a data center and network architecture built to meet the requirements of the most security-sensitive organizations.
- Economical
- Amazon EC2 passes on to you the financial benefits of Amazon’s scale. You pay a very low rate for the compute capacity you actually consume.
- Ease-of-Use
- There are several ways to get started with Amazon EC2.
- AWS Management Console
- AWS Command Line Tools (CLI)
- AWS SDKs
EC2 Functionality
To use Amazon EC2, you simply:
- Select a pre-configured, templated Amazon Machine Image (AMI) to get up and running immediately. Or create an AMI containing your applications, libraries, data, and associated configuration settings.
- Configure security and network access on your Amazon EC2 instance.
- Choose which instance type(s) you want, then start, terminate, and monitor as many instances of your AMI as needed, using the web service APIs or the variety of management tools provided.
- Determine whether you want to run in multiple locations, utilize static IP endpoints, or attach persistent block storage to your instances.
- Pay only for the resources that you actually consume, like instance-hours or data transfer.
Operating systems
Amazon Machine Images (AMIs) are preconfigured with an ever-growing list of operating systems. We work with our partners and community to provide you with the most choice possible. You are also empowered to use our bundling tools to upload your own operating systems. The operating systems currently available to use with your Amazon EC2 instances include:
- Amazon Linux
- Microsoft Server 2012
- CentOS 6.5
- Debian 7.4
EC2 Instance Types
Amazon EC2 provides a wide selection of instance types optimized to fit different use cases. Instance types comprise varying combinations of CPU, memory, storage, and networking capacity and give you the flexibility to choose the appropriate mix of resources for your applications. Each instance type includes one or more instance sizes, allowing you to scale your resources to the requirements of your target workload.
- A1
- Amazon EC2 A1 instances deliver significant cost savings and are ideally suited for scale-out and Arm-based workloads that are supported by the extensive Arm ecosystem. A1 instances are the first EC2 instances powered by AWS Graviton Processors that feature 64-bit Arm Neoverse cores and custom silicon designed by AWS.
- T3
- T3 instances are the next generation burstable general-purpose instance type that provide a baseline level of CPU performance with the ability to burst CPU usage at any time for as long as required. T3 instances offer a balance of compute, memory, and network resources and are designed for applications with moderate CPU usage that experience temporary spikes in use.
- T2
- T2 instances are Burstable Performance Instances that provide a
baseline level of CPU performance with the ability to burst above the
baseline. T2 instances are a good choice for a variety of
general-purpose workloads including micro-services, low-latency
interactive applications, small and medium databases, virtual desktops,
development, build and stage environments, code repositories, and
product prototypes. Use cases include Websites and web applications,
development environments, build servers, code repositories, micro
services, test and staging environments, and line of business
applications.
- High frequency Intel Xeon processors
- Burstable CPU, governed by CPU Credits, and consistent baseline performance
- Lowest-cost general purpose instance type, and Free Tier eligible14
- Balance of compute, memory, and network resources
- M5
- M5 instances are the latest generation of General Purpose Instances. This family provides a balance of compute, memory, and network resources, and is a good choice for many applications. Use cases include Small and mid-size databases, data processing tasks that require additional memory, caching fleets, and for running backend servers for SAP, Microsoft SharePoint, cluster computing, and other enterprise applications
- M5a
- M5a instances are the latest generation of General Purpose Instances. This family provides a balance of compute, memory, and network resources, and is a good choice for many applications.
- M4
- M4 instances provide a balance of compute, memory, and network resources, and it is a good choice for many applications.
- Compute Optimized
- Memory Optimized
- Accelerated Computing
- Storage Optimized
EC2 Concepts
- Instances
- Virtual computing environments
- Amazon Machine Images (AMIs)
- Preconfigured templates for your instances that package the bits you need for your server (including the operating system and additional software)
- Instance types
- Various configurations of CPU, memory, storage, and networking capacity for your instances
- Key pairs
- Secure login information for your instances (AWS stores the public key, and you store the private key in a secure place)
- Instance store volumes
- Storage volumes for temporary data that’s deleted when you stop or terminate your instance
- Amazon EBS volumes
- Persistent storage volumes for your data using Amazon Elastic Block Store (Amazon EBS)
- Regions and Availability Zones
- Multiple physical locations for your resources, such as instances and Amazon EBS volumes
- Security groups
- A firewall that enables you to specify the protocols, ports, and source IP ranges that can reach your instances
- Elastic IP addresses
- Static IPv4 addresses for dynamic cloud computing
- Tags
- Metadata that you can create and assign to your Amazon EC2 resources
- Virtual Private Clouds (VPCs)
- Virtual networks you can create that are logically isolated from the rest of the AWS cloud, and that you can optionally connect to your own network
4.4.3 Serving HTTPS Requests for an Amazon S3 Bucket
NOTE: The Amazon S3 website endpoints do not support HTTPS. For information about using HTTPS with an Amazon S3 bucket, see
- How do I use CloudFront to serve HTTPS requests for my Amazon S3 bucket?
- Requiring HTTPS for Communication Between CloudFront and Your Amazon S3 Origin
Configure a CloudFront Distribution to Serve HTTPS Requests using S3
- Open the CloudFront console
- Choose
Create Distribution - Under
Web, chooseGet Started - For
Origin Domain Name, you can either choose- your S3 bucket’s REST API endpoint from the drop-down menu, or
- you can enter your S3 bucket’s website endpoint.
- see Key Differences Between the Amazon Website and the REST API Endpoint
For
Viewer Protocol Policy, choose HTTP and HTTPSNote: Choosing HTTPS Only blocks all HTTP requests.
If you’re not using a custom domain with CloudFront, choose Create
Distribution to complete the process. If you are using a custom domain, follow
these additional steps before you create the distribution:
- For
Alternate Domain Names (CNAMEs), type your custom domain. For
SSL Certificate, chooseCustom SSL Certificate. Then, choose the custom SSL certificate to assign to the distribution.Note: For more information on installing a certificate, see How do I install SSL/TLS certificates on Amazon CloudFront?
Choose
Create Distribution.Note: After you choose Create Distribution, it can take about 20 minutes for your distribution to deploy.
Update the DNS for your domain to a CNAME record that points to the CloudFront distribution’s provided domain. You can find your distribution’s domain name in the CloudFront console.
If you’re using Amazon Route 53 as your DNS provider:
- you can create an alias record (
example.com Alias
       d111111abcdef8.cloudfront.net
) to point the record to your CloudFront distribution.
If you’re using another DNS provider:
- you can create only a
CNAMErecord (www.example.com CNAME d111111abcdef8.cloudfront.net) to point to the distribution’s domain.
Important: DNS standards require that an apex domain (
example.com) use an authoritative (A) record that maps to an IP address. You can point your apex domain to your CloudFront distribution only if you’re using Route 53. If you’re using another DNS provider, you must use a subdomain (www.example.com).- you can create an alias record (
Requiring HTTPS for Communication Between CloudFront and Your Amazon S3 Origin
When your origin is an Amazon S3 bucket, your options for using HTTPS for communications with CloudFront depend on how you’re using the bucket. If your Amazon S3 bucket is configured as a website endpoint, you can’t configure CloudFront to use HTTPS to communicate with your origin because Amazon S3 doesn’t support HTTPS connections in that configuration.
When your origin is an Amazon S3 bucket that supports HTTPS communication,
CloudFront always forwards requests to S3 by using the protocol that viewers
used to submit the requests. The default setting for the Origin Protocol Policy
setting is Match Viewer and can’t be changed.
If you want to require HTTPS for communication between CloudFront and Amazon
S3, you must change the value of Viewer Protocol Policy to Redirect HTTP to
HTTPS or HTTPS Only. The procedure later in this section explains how to
use the CloudFront console to change Viewer Protocol Policy. For information
about using the CloudFront API to update the ViewerProtocolPolicy element for
a web distribution, see UpdateDistribution in the Amazon CloudFront API
Reference.
When you use HTTPS with an Amazon S3 bucket that supports HTTPS communication, Amazon S3 provides the SSL/TLS certificate, so you don’t have to.
To configure CloudFront to require HTTPS to your Amazon S3 origin
- Sign in to the AWS Management Console and open the CloudFront console
- In the top pane of the CloudFront console, choose the ID for the distribution that you want to update.
- On the
Behaviorstab, choose the cache behavior that you want to update, and then chooseEdit. - Specify one of the following values for
Viewer Protocol Policy:- Redirect HTTP to HTTPS
Viewers can use both protocols, but HTTP requests are automatically redirected to HTTPS requests. CloudFront returns HTTP status code
301(Moved Permanently) along with the new HTTPS URL. The viewer then resubmits the request to CloudFront using the HTTPS URL.When a viewer makes an HTTP request that is redirected to an HTTPS request, CloudFront charges for both requests. For the HTTP request, the charge is only for the request and for the headers that CloudFront returns to the viewer. For the HTTPS request, the charge is for the request, and for the headers and the object returned by your origin.
- HTTPS Only
- Viewers can access your content only if they’re using HTTPS.
If a viewer sends an HTTP request instead of an HTTPS
request, CloudFront returns HTTP status code
403(Forbidden) and does not return the object.
- Choose
Yes, Edit. - Repeat steps 3 through 5 for each additional cache behavior that you want to require HTTPS for between viewers and CloudFront, and between CloudFront and S3.
- Confirm the following before you use the updated configuration in a
production environment:
- The path pattern in each cache behavior applies only to the requests that you want viewers to use HTTPS for.
- The cache behaviors are listed in the order that you want CloudFront to evaluate them in. For more information, see Path Pattern.
- The cache behaviors are routing requests to the correct origins.
4.4.4 Using Alternate Domain Names and HTTPS
If you want to use your own domain name in the URLs for your files (for
example, https://www.example.com/image.jpg) and you want your viewers to use
HTTPS, you must complete the additional steps that are described in this topic.
Important: When you add a certificate to your distribution, CloudFront immediately propagates the certificate to all of its edge locations. As new edge locations become available, CloudFront will propagate the certificate to those locations, too. You can’t restrict the edge locations that CloudFront propagates the certificates to.
Using SNI to Serve HTTPS Requests (Works for Most Clients)
If you configure CloudFront to serve HTTPS requests using SNI, CloudFront associates your alternate domain name with an IP address for each edge location. When a viewer submits an HTTPS request for your content, DNS routes the request to the IP address for the correct edge location. The IP address to your domain name is determined during the SSL/TLS handshake negotiation; the IP address isn’t dedicated to your distribution.
The SSL/TLS negotiation occurs very early in the process of establishing an HTTPS connection. If CloudFront can’t immediately determine which domain the request is for, it drops the connection. When a viewer that supports SNI submits an HTTPS request for your content, here’s what happens:
- The viewer automatically gets the domain name from the request URL and adds it to a field in the request header.
- When CloudFront receives the request, it finds the domain name in the request header and responds to the request with the applicable SSL/TLS certificate.
- The viewer and CloudFront perform SSL/TLS negotiation.
- CloudFront returns the requested content to the viewer.
Configuring Alternate Domain Names and HTTPS
To use alternate domain names in the URLs for your files and to use HTTPS between viewers and CloudFront, perform the applicable procedures.
Getting an SSL/TLS Certificate
Get an SSL/TLS certificate if you don’t already have one. For more information, see the applicable documentation:
- To use a certificate provided by AWS Certificate Manager (ACM), see the
- AWS Certificate Manager User Guide
- Then skip to Updating Your CloudFront Distribution.
- AWS recommends that you use ACM to provision, manage, and deploy SSL/TLS certificates on AWS managed resources.
Updating Your CloudFront Distribution
To update settings for your distribution, perform the following procedure:
To configure your CloudFront distribution for alternate domain names:
- Sign in to the AWS Management Console and open the CloudFront console
- Choose the ID for the distribution that you want to update.
- On the General tab, choose Edit.
- Update the following values:
- Alternate Domain Names (CNAMEs)
- Add the applicable alternate domain names. Separate domain names with commas, or type each domain name on a new line.
- SSL Certificate (Web Distributions Only)
- Choose Custom SSL Certificate, and choose a certificate from the list.
- Clients Supported (Web Distributions Only)
- Choose the applicable option:
- All Clients - CloudFront serves your HTTPS content using dedicated IP addresses. If you select this option, you incur additional charges when you associate your SSL/TLS certificate with a distribution that is enabled.
- Only Clients that Support Server Name Indication (SNI) - Older browsers or other clients that don’t support SNI must use another method to access your content.
- Choose Yes, Edit.
- Configure CloudFront to require HTTPS between viewers and CloudFront:
- On the Behaviors tab, choose the cache behavior that you want to update, and choose Edit.
- Specify one of the following values for Viewer Protocol Policy:
- Redirect HTTP to HTTPS
- Viewers can use both protocols, but HTTP requests are automatically redirected to HTTPS requests. CloudFront returns HTTP status code 301 (Moved Permanently) along with the new HTTPS URL. The viewer then resubmits the request to CloudFront using the HTTPS URL.
- HTTPS Only
- Viewers can access your content only if they’re using HTTPS. If a viewer sends an HTTP request instead of an HTTPS request, CloudFront returns HTTP status code 403 (Forbidden) and does not return the file.
- Choose Yes, Edit.
- Repeat steps a through c for each additional cache behavior that you want to require HTTPS for between viewers and CloudFront.
- Confirm the following before you use the updated configuration in a
production environment:
- The path pattern in each cache behavior applies only to the requests that you want viewers to use HTTPS for.
- The cache behaviors are listed in the order that you want CloudFront to evaluate them in. For more information, see Path Pattern.
- The cache behaviors are routing requests to the correct origins.
AWS Certificate Manager User Guide
Welcome to the AWS Certificate Manager (ACM) service. ACM handles the complexity of creating and managing public SSL/TLS certificates for your AWS based websites and applications. You can use public certificates provided by ACM (ACM certificates) or certificates that you import into ACM. ACM certificates can secure multiple domain names and multiple names within a domain. You can also use ACM to create wildcard SSL certificates that can protect an unlimited number of subdomains.
ACM is tightly linked with AWS Certificate Manager Private Certificate Authority. You can use ACM PCA to create a private certificate authority (CA) and then use ACM to issue private certificates. These are SSL/TLS X.509 certificates that identify users, computers, applications, services, servers, and other devices internally. Private certificates cannot be publicly trusted.
Request a Public Certificate
The following sections discuss how to use the ACM console or AWS CLI to request a public ACM certificate.
Requesting a public certificate using the console
- Sign into the AWS Management Console and open the ACM console
On the Request a certificate page, type your domain name. You can use a fully qualified domain name (FQDN) such as www.example.com or a bare or apex domain name such as example.com. You can also use an asterisk (*) as a wildcard in the leftmost position to protect several site names in the same domain. For example, *.example.com protects corp.example.com, and images.example.com. The wildcard name will appear in the Subject field and the Subject Alternative Name extension of the ACM certificate.
When you request a wildcard certificate, the asterisk (*) must be in the leftmost position of the domain name and can protect only one subdomain level. For example, *.example.com can protect login.example.com, and test.example.com, but it cannot protect test.login.example.com. Also note that *.example.com protects only the subdomains of example.com, it does not protect the bare or apex domain (example.com). To protect both, see the next step.
- To add more domain names to the ACM certificate, choose Add more names and type another domain name in the text box that opens. This is useful for protecting both a bare or apex domain (like example.com) and its subdomains (*.example.com).
- After you have typed valid domain names, choose Review and Request or choose Cancel to quit.
If the review page correctly contains the information that you provided for your request, choose Confirm and request. The following page shows that your request status is pending validation.
Before ACM issues a certificate, it validates that you own or control the domain names in your certificate request. You can use either email validation or DNS validation. If you choose email validation, ACM sends validation email to three contact addresses registered in the WHOIS database and to five common system administration addresses for each domain name. You or an authorized representative must reply to one of these email messages.
If you use DNS validation, you simply write a CNAME record provided by ACM to your DNS configuration. If you are able to edit your DNS configuration, we recommend that you use DNS domain validation rather than email validation. DNS validation has multiple benefits over email validation.
4.5 Dynamic Web Sites on AWS using EC2
4.5.1 Amazon Elastic Compute Cloud—EC2
Register a Domain Name and Connect to an EC2 Instance
Register a new domain name for your website and connect that domain name through the Domain Name System (DNS) to a running EC2 instance (such as a WebApp, or website running WordPress, Apache, NGINX, IIS, or other Website platform).15
There’s an annual fee to register a domain, ranging from $9 to several
hundred dollars, depending on the top-level domain, such as .com. For more
information, see Amazon Route 53 Pricing for Domain Registration.
Step 1—Obtain a Static URL
NOTE: If you are using Elastic Load Balancing (Elastic Load Balancing is done automatically if you launched your app with Amazon Elastic Beanstalk) then you do not need to obtain a static IP address and can go directly to step 2.
- Open the Elastic IPs part of the EC2 console in a new window and click
Allocate New Address. Set EIP used in: to
VPCand clickYes, Allocate. Note your new IP address and click Close.New address request succeeded Elastic IP 3.211.150.216
NOTE: There is no charge for Elastic IP addresses (EIPs) that are connected to running instances. If you remove the instance (e.g. the EIP is no longer connected to a running instance) then there is a cost of $0.005/hr for the EIP).
Select the new IP addressin the Elastic IP column. Press theActionsbutton and choose theAssociate Addressoption.- Click in the
Instancetext box andchoose the option that has your instance name. - Verify that your new Elastic IP address is working by typing it into your web browser.
Step 2—Register a Domain Name
You now have an IP address associated with your instance. You now need to configure the Domain Name System (DNS) to point to this address.
NOTE: In this example we will be acquiring a new domain name and associating it with the Elastic IP address we just created (which is attached to your instance). If you already have a domain name, or if you choose to use another domain registrar to get a domain name, please refer to their documentation on configuring DNS for your instance.
- Open the Route 53 console in a new window (Route 53 is AWS’s DNS service). You can register new domain names with Route 53 as well as manage DNS records for your domain.
- Click the
Register Domainbutton. On the next screen, enter the domain you want in theChoose a Domainbox (cloudexamples is shown in the image, then select aTop Level Domain(TLD) (e.g..com,.org,.co.uk, etc.) And click theCheckbutton to see if the domain is available. n If the domain is available, click theAdd to cartbutton and scroll to the bottom of the page to clickContinue. - Enter your
Contact Details. These are the details that will be associated with your domain name. When you are done, clickContinueat the bottom of the page. - Review the details as they are listed and, if they are correct, check the box
titled I have read and agree to the AWS Domain Name Registration
Agreement. Then click the
Complete Purchasebutton. - If you registered a domain that has a generic top-level domain (such as
.com), you’ll receive an email that asks you to confirm your email address. (We don’t send an email if we already have confirmation that the email address is valid.). You must follow the link in this email to confirm your email address, or the domain won’t be registered.. For all domains, you’ll receive an email when your domain registration has been approved.
Step 3—Configure DNS
The last step is to configure the DNS so that the new domain we created in step 2 can point to the address we have for our server. This can be the static IP address (from step 1) or a fully qualified domain name (FQDN) that is automatically created if you are using Amazon Elastic Beanstalk.
Note that when you register a domain, we automatically create a hosted zone that has the same name as the domain.16
- Open the Hosted Zones part of the Route 53 console. Click on the domain name you created in step 2.
- Click the
Create Record Setbutton. On the right side of the window, enterwwwin the Name text box. Enter the Elastic IP address you created in step 1 in the Value box and then clickCreate. - Verify that you have a new entry in the main table with the value you entered.
- Verify that your website is now available at your new domain by typing your new website address into your web browser.
4.6 Dynamic Web Sites on AWS using Lightsail
4.6.1 Tutorial on Deploying a LAMP Stack using Lightsail
4.7 Single Page React Apps on AWS
Footnotes:
An Internet backbone is a very high-speed data transmission line that provides networking facilities to relatively small but high-speed Internet service providers all around the world. Internet backbones are the largest data connections on the Internet. They require high-speed bandwidth connections and high-performance servers/routers. Backbone networks are primarily owned by commercial, educational, government and military entities because they provide a consistent way for Internet service providers (ISPs) to keep and maintain online information in a secure manner.
For more information, perform an internet search on “free DNS service.”
Your new records take time to propagate to the Route 53 DNS servers. Currently, the only way to verify that changes have propagated is to use the GetChange API action. Changes generally propagate to all Route 53 name servers within 60 seconds.
For information about the required format of the zone file, see Creating Records By Importing a Zone File.
You can create a hosted zone only for a domain that you have permission to administer.
There’s an annual fee to register a domain, ranging from $9 to several
hundred dollars, depending on the top-level domain, such as .com.
Each record contains information about how you want to route traffic for
one domain (such as example.com) or subdomain (such as www.example.com or
test.example.com). Records are stored in the hosted zone for your domain.
For more information about bucket policies, see Using Bucket Policies and User Policies
For information about managing ACLs, see Managing Access with ACLs.
For step-by-step instructions, see How Do I Upload an Object to an S3 Bucket? in the Amazon Simple Storage Service Console User Guide.
Each record contains information about how you want to route traffic for one domain (example.com) or subdomain (www.example.com). Records are stored in the hosted zone for your domain.
t2.micro only. If configured as T2 Unlimited, charges may apply if average CPU utilization exceeds the baseline of the instance.
If you already have a domain name registered, do step 1 and then refer to your domain registrar’s documentation for how to set the DNS record for your new site.
A hosted zone is a container for records, and records contain information about how you want to route traffic for a specific domain, such as example.com, and its subdomains (acme.example.com, zenith.example.com). A hosted zone and the corresponding domain have the same name.